cloud
Microsoft Azure Diagram Generator
Microsoft Azure diagrams are a useful tool when building or managing Azure Cloud infrastructure. Here's how to Automate the process.
There's no question that an accurate infrastructure diagram is invaluable to your cloud team. Whether you're a cloud architect looking to redesign existing infrastructure, a DevOps engineer tasked with implementing a design or a project manager making sure the roll out has been executed according to the scope, an accurate diagram makes life easier at every step of the project.
In the past, the thought of having to create network diagrams was never met with a rush of excitement or enthusiasm. In reality it was a bit of a nightmare. Hours and hours dragging and dropping icons, checking and rechecking console settings, trying to logically arrange things so they could easily be understood and connecting the resources, so you could tell what was going on.
Then you would always be second guessing yourself. Did I miss something? What are the other teams rolling out in this environment that i'm not aware of yet? Have any resources been added or removed since the initial design.
If you're working in a fast paced dev environment, you may have even avoided creating documentation, until of course the CTO asks why the cloud spend increased by 50% this quarter.
The biggest challenge with diagramming cloud infrastructure, apart from finding the time to do it in the first place, is keeping it up to date. Especially with dynamic components, autoscaling resources and the need to build in acceptable redundancy into the network designs, the ever changing cloud configuration presents an ever moving target that can be expensive and time consuming to document.
hava.io provides both a cloud based or self hosted solution to automatically document your cloud environments by:
To import environment diagram data from Azure, you will need to access your Azure Portal at https://portal.azure.com , create a new Service Principle and retrieve a set of credentials for your account.
Open the Azure Portal and launch PowerShell from the top menu bar :
1. Launch Powershell
Open the Azure Portal and launch PowerShell from the top menu bar

2. Create Service Principal
You will need to create a new Service Principal from the command line and a display name. In the below code example, we’ve used HavaServicePrincipal you can edit and choose a name that suits you.

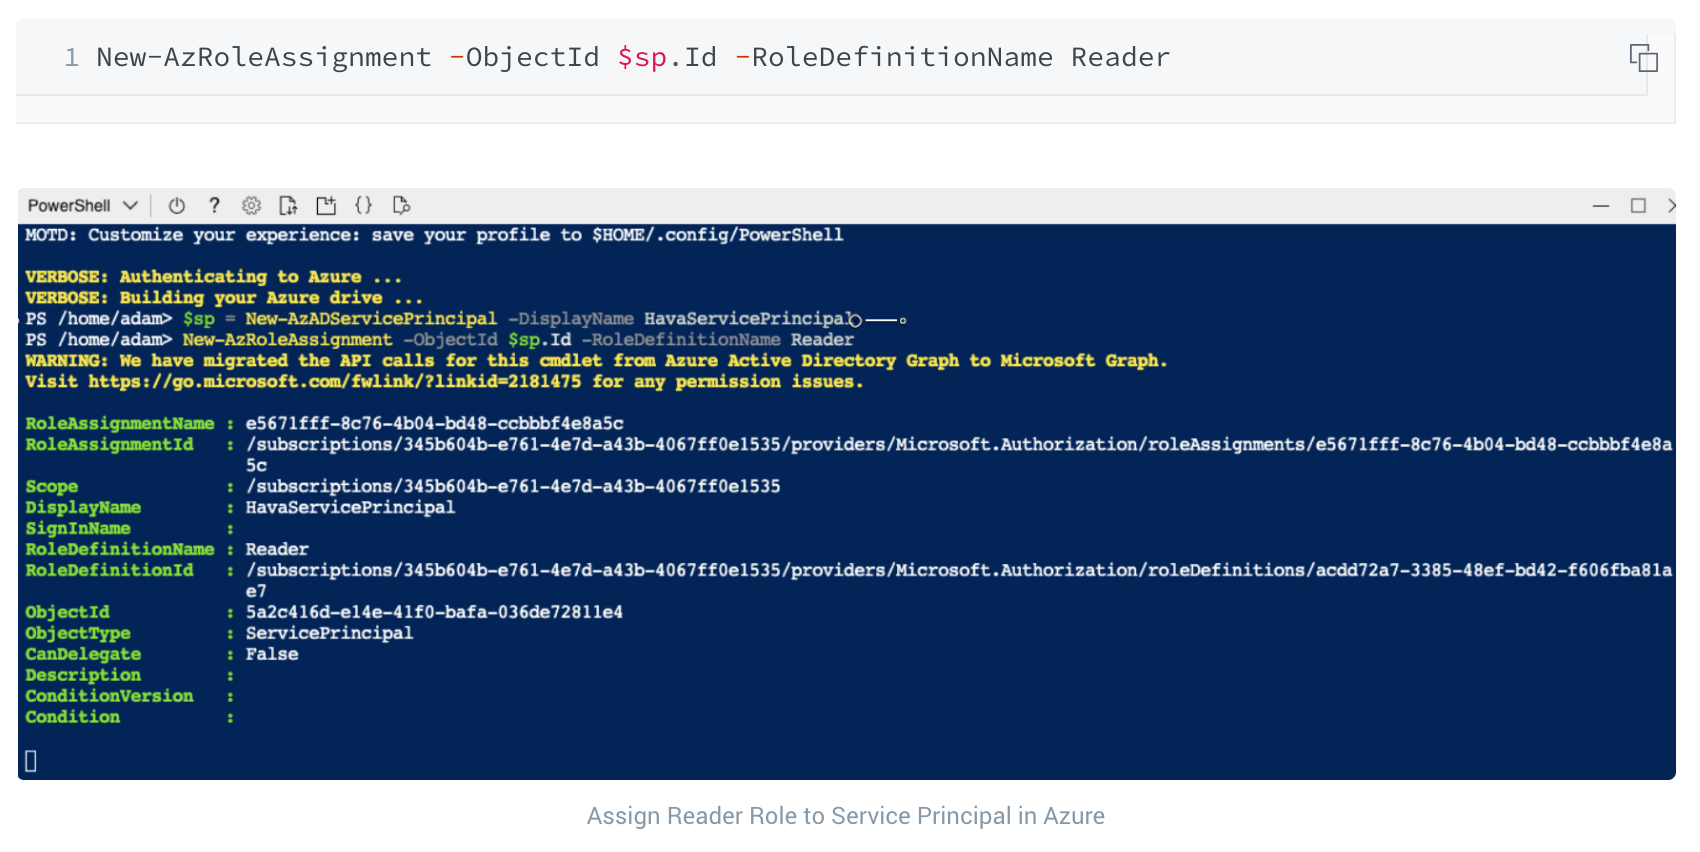
3. Assign Reader Role
Hava only requires read-only access so, you can assign the read-only permissions to the Service Principal account using the below command.
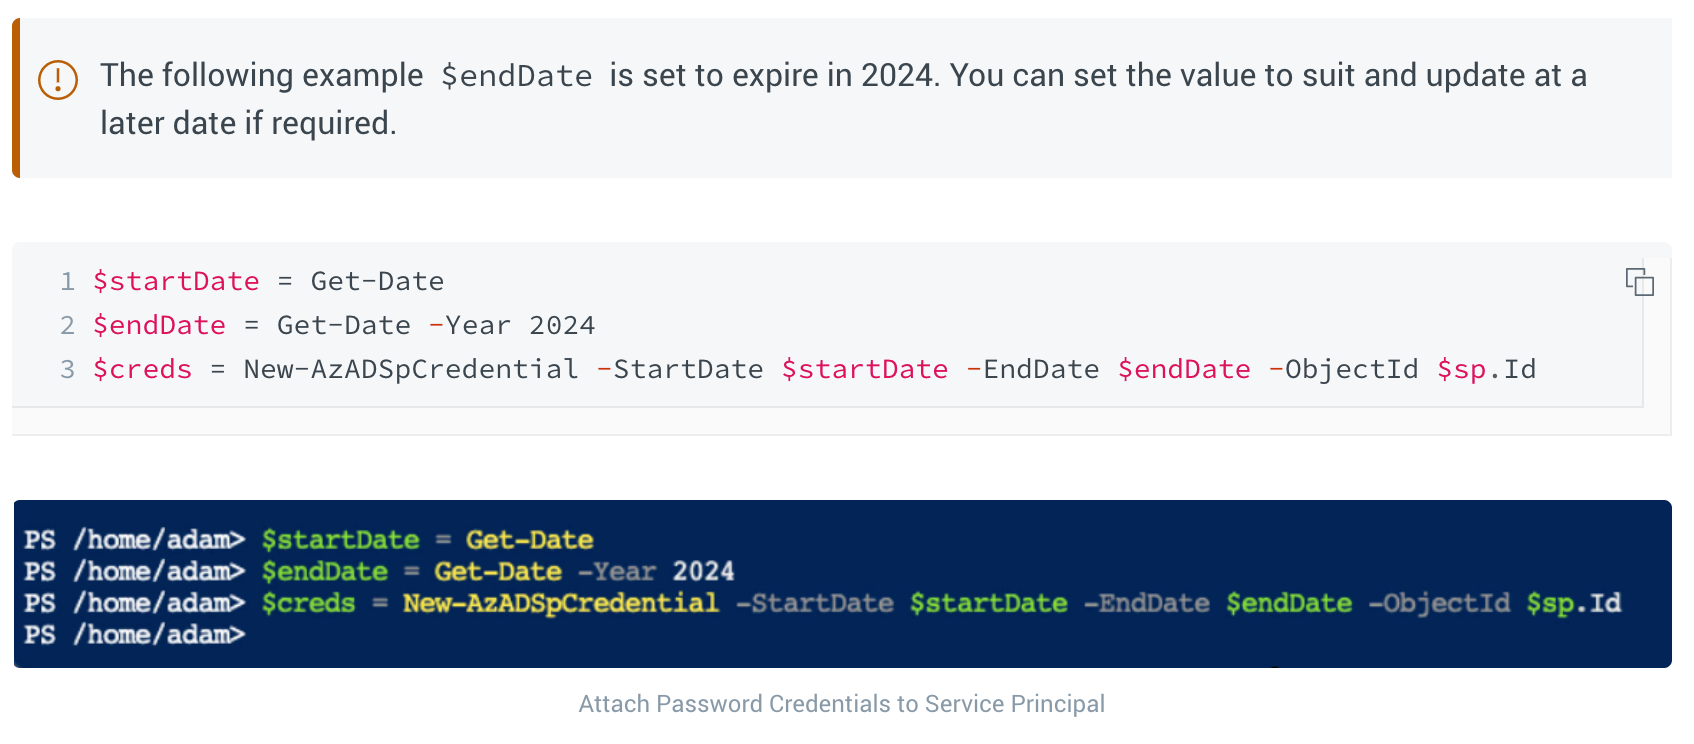
4. Create the Password
Once you’ve created the Service Principal and assigned it with a Reader Role, you need to create password credentials to attach to the Service Principal.
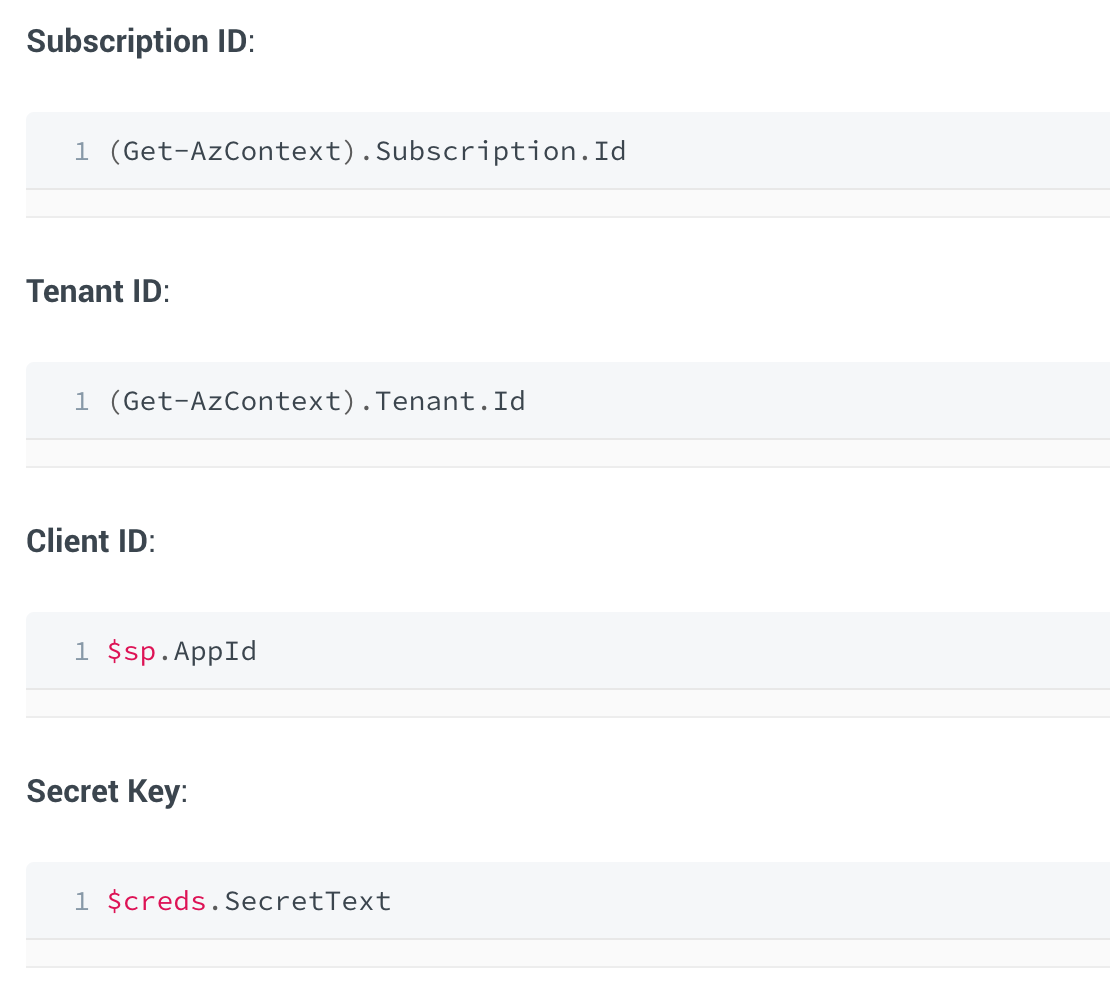
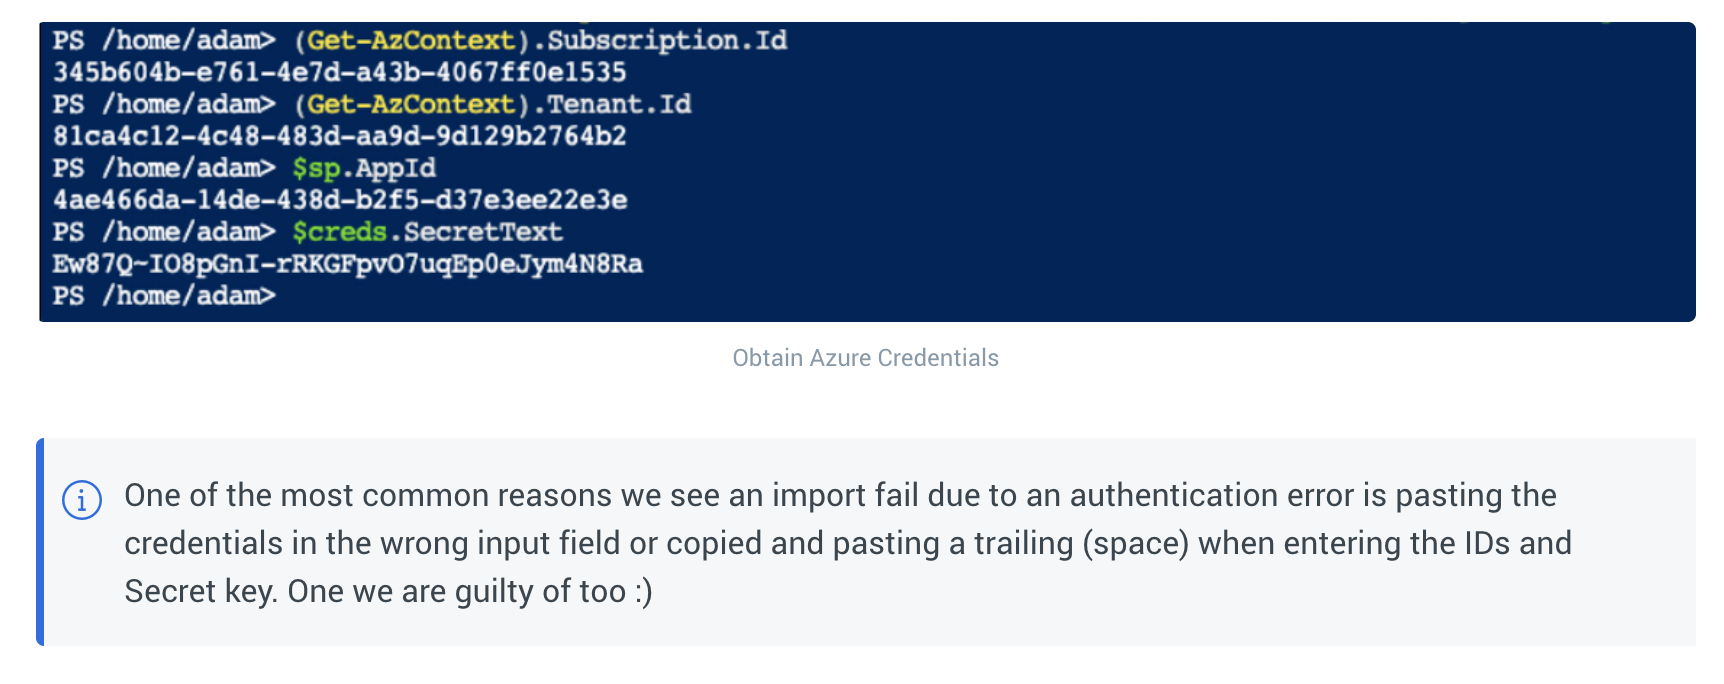
5. Obtaining the Credentials
The final step required is to retrieve the necessary credentials to input into Hava.
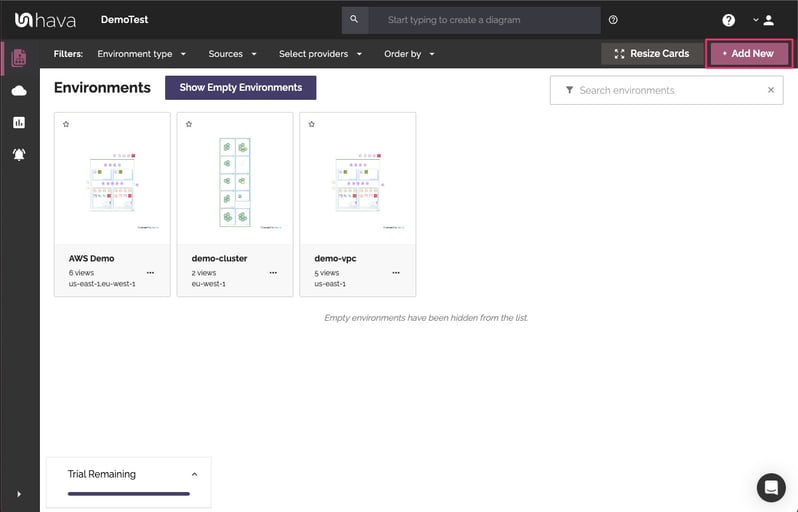
Once you have the required credentials, you can log in to Hava which will open up the environments screen. You then select "Add New"
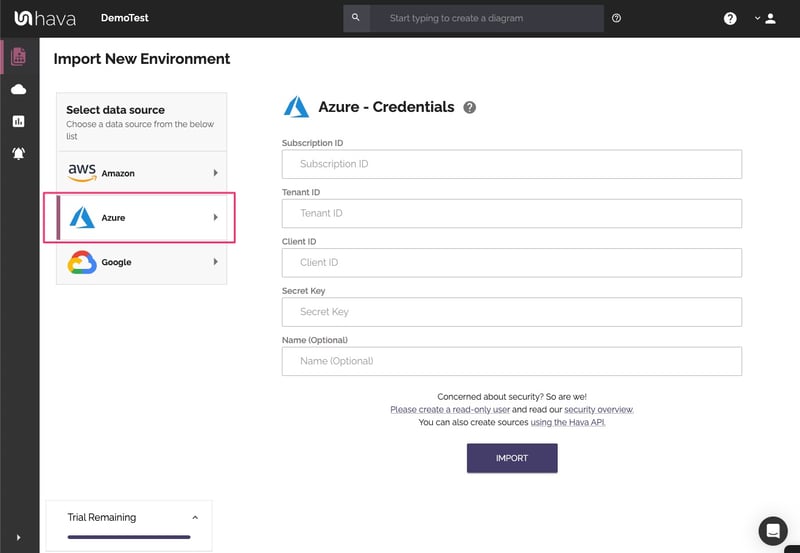
Click on the "Azure" Tab and enter the credentials you have just gathered from your Azure PowerShell.
Hava will import your Azure Environment, layout the diagram and add the environment tile to the Hava Environments screen. From this point Hava will sync with Azure every hour and log any structural changes, so you always have an accurate visual representation of your Azure Environment and a versioning audit trail of any changes made.
Hava visualises the important components of all the environments it supports. There are other attributes that are displayed when visualised elements are selected to keep the diagrams clean and readable.
Here is a list of imported Azure resources. Visualised resources will appear as a container or icon. Attributes will appear in the Attributes sidebar as elements are selected.
|
Resource |
Visualised |
Attributes |
|
Application Gateway |
✓ |
|
|
Availability Set |
|
✓ |
|
Express Route |
✓ |
|
|
Load Balancer |
✓ |
|
|
Local Network Gateway |
✓ |
|
|
Network Interface |
|
✓ |
|
Network Security Group |
|
✓ |
|
Public IP |
|
✓ |
|
Redis Cache |
✓ |
|
|
Resource Group |
✓ |
|
|
Route Table |
✓ |
|
|
SQL Server |
✓ |
|
|
Storage Account |
✓ |
|
|
Subnet |
✓ |
|
|
Virtual Machine |
✓ |
|
|
Virtual Machine Extension |
|
✓ |
|
Virtual Machine Scale Set |
|
✓ |
|
Virtual Network |
✓ |
|
|
Virtual Network Gateway |
✓ |
|
|
Virtual Network Peering |
✓ |
|
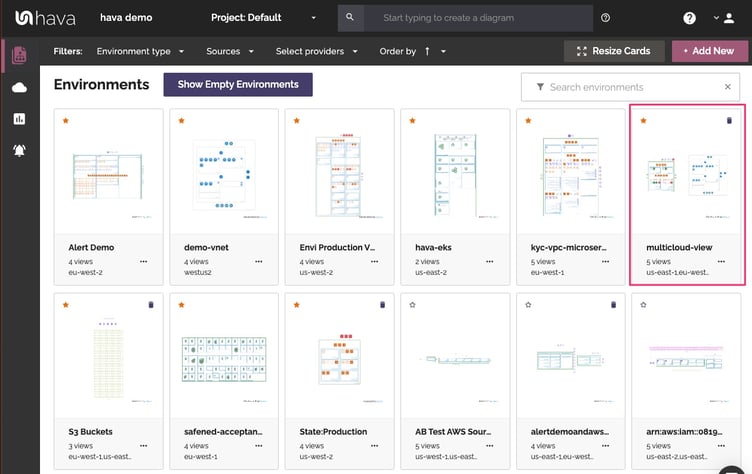
Once imported, all the virtual networks detected in your Azure account will be presented as tiles on the Hava dashboard.
Once Hava has auto generated your Azure infrastructure diagrams, you can create custom diagrams featuring subsets of data like:
Because the hava application is 100% API driven, anything you can see visualized on the diagrams or resource lists can also be returned via API call and integrated into your build pipeline artefacts or internal code or documentation repositories.
Whether you are looking at the current set of diagrams, of viewing historical archived versions, all the Hava diagrams are fully interactive. Clicking on a resource changes the attribute pane to reveal all the important settings related to the resource like :
Clicking on the data in the attributes pane, will dive deeper into the associated resources, so you can find out all you need to know without having to go back to the Azure portal.
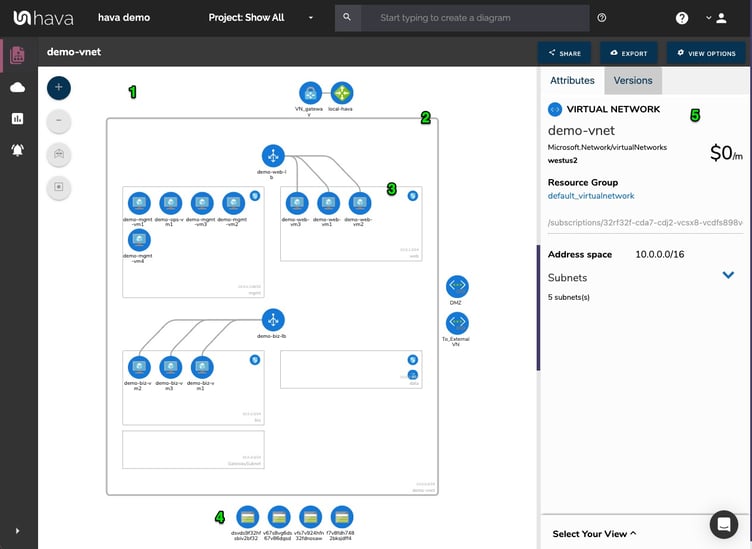
The Azure diagram is laid out as follows:
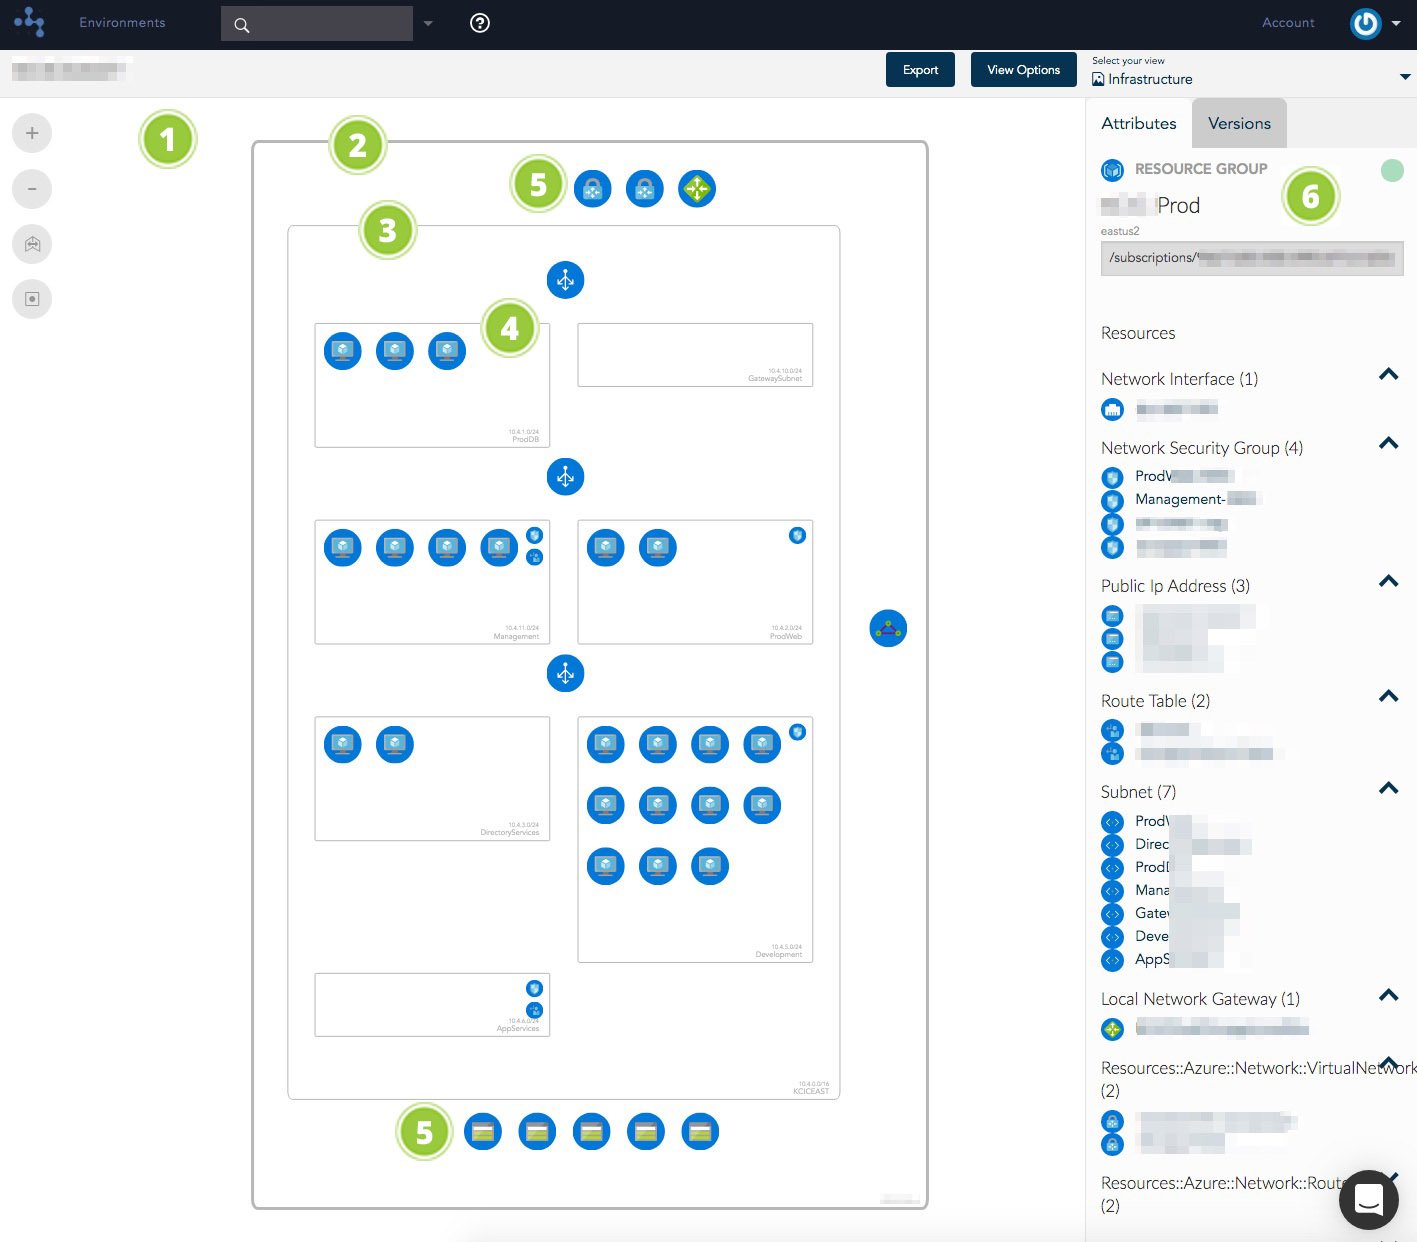
Environment - when this top level view is selected, the data source and total monthly estimate is shown
Resource Group - Details all the resources in the group such as Network Interfaces, Public IPs, Route Tables, Subnets, Local Network Gateways. If selectable in the Attributes Tab, you can select and view more details pertaining to the resource.
Virtual Network - contains resources such as load balancers, subnets etc
Subnet - Select a subnet and the attribute tab will display information such as the Network Security Groups the Subnet belongs to and Route Table information.
Resources external to a Virtual Network. In this example we have a Virtual Network Gateway, Local Network Gateway, Express Route Circuit and several Storage Accounts.
Attribute Tab - this displays attributes and their values that are contextual to the currently selected resource or network segment.
We firmly believe that the accurate yet effortless cloud documentation automatically produced by hava.io is the fastest and most accurate way to keep your cloud documentation up to date.
Hands free, you release yourself and your team from drag and drop forever.
You always have an historical audit trail of all the major changes to your cloud settings should you ever be subjected to a PCI compliance, insurance or legal audit.
You can also export diagrams and itemised costing spreadsheets via CSV so you can complete your monthly reports easily, or respond to requests from your up line management or accounting department in minutes not days.
You could also build API calls into a dashboard to watch your cloud spend estimates live as your environment autoscales. With the API your options are limitless.
You can view detailed walkthrough here:
If you would like start building 100% accurate hassle free Azure diagrams, we have a 14 day free trial you can use to get to grips with this easy to use software.
The trial is fully functional & you won't need a credit card to take it for a spin.
Hit the button below to learn more
Thanks.
~ Team Hava
Microsoft Azure diagrams are a useful tool when building or managing Azure Cloud infrastructure. Here's how to Automate the process.
Microsoft Azure diagrams are a useful tool when building or managing Azure Cloud infrastructure. Here's how to Automate the process using Hava.
Microsoft Azure diagrams are an essential tool when building or managing Azure Cloud infrastructure. Here's how to Automate the process.