aws
Cloud Diagram Collaboration
Hava Teams allows you to invite other users to use your Hava teams account. You can share data sources, environments and diagrams and use projects to...
Hava is pleased to announce the integration of SSO capabilities, with the initial preview supporting SAML and OIDC providers.
You can now use SSO to better protect access to the data and diagrams in your Hava account. SSO is currently in beta release for business account users and can be enabled for your account by contacting support@hava.io
Setting up Hava to use SSO is a simple process, however you will need to be the account owner.
To connect to your SSO provider, go to your account settings and select SSO Config to get started.
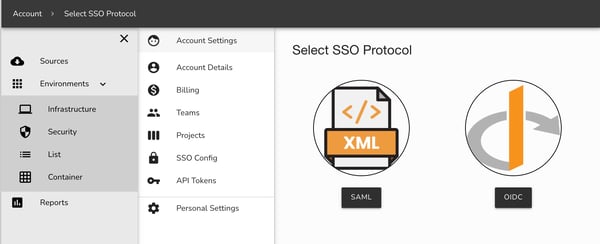
Currently SAML and OIDC are supported however several other platform specific apps are under development.
This will allow your users to login to Hava via a custom Okta OIDC application. These steps can be followed for most SSO identity providers, though the field names may be different. Custom apps will be coming soon.
Log into Hava and head to your Account Settings. From there select SSO Config, then click OIDC on the protocol selection page. This will show you the Service Provider values you will need to enter into Okta
Log into Okta and click Applications → Create App Integration
Select ‘OIDC - OpenID Connect’ and then ‘Web Application’ for the Application type, then click Next
Enter the following details into the settings:
Name should be Hava
Grant Type should be Authorization Code
Sign-in redirect URIs should be set to the value of Sign-in Redirect URI from the Service Provider section in Hava
Assignments should be set based on your requirements
All other values can be left as the defaults. Click Save to complete the Okta setup.
Head back to the Hava SSO OIDC config page and select Add OIDC Config
Enter the config values from the Okta setup instructions:
Identity Provider Host should be set to Okta domain without any prefix or trailing slash, i.e. http://test-oidc.okta.com and not http://test-oidc.okta.com/
OIDC client ID should be set to Client ID
OIDC client Secret should be set to Client secret
Click Save to complete the setup

Once you’ve configured your provider your team members will still be able to login to your account with their standard user and password, as well as the SSO provider. This allows you to test and update the details, or remove them if they are no longer required.
Once you have defined your configuration you can enable your provider - this will prevent users accessing your account unless they are logged in via your SSO provider.
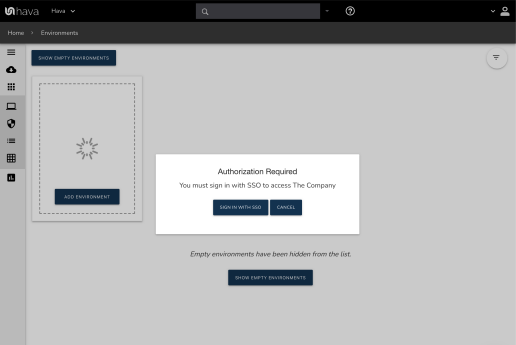
Once a provider is enabled all users will need to login through your IDP to access your account, except for the account owner. If you need to modify or delete your configuration you will first need to disable the provider.
If you no longer require a configured SSO provider, or you’d like to move to a new one, you can delete your existing configuration. Your provider must be disabled for the delete option to appear.
Once your SSO provider is removed your team members will once again be able to access your account through password login.
Not at this time. Any users you wish to use SSO must be first invited to a team in your account. Once they accept the invite they will be able to access your account.
You will need to make sure they are removed from all teams in your account. If they are no longer in your SSO IDP they will not be able to login via SSO to access your account as well.
Can we use multiple SSO providers?
At the moment Hava only supports a single IDP per account, but we are looking to add support for more in future.
Teams must be created in Hava and users assigned manually at this time.
SSO is currently only available on Business plans and is currently in beta. Contact us at support@hava.io if you would like to try it out.
So that's a quick run through of the new Hava SSO capabilities. If you have any questions, please get in touch.
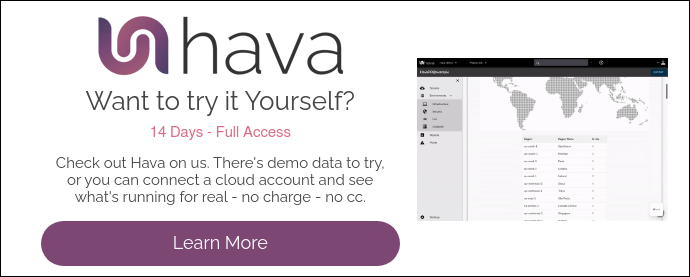
If you are not using Hava to automatically generate your AWS, Azure or GCP cloud network topology diagrams, then please click the button below and take a free trial.
Hava Teams allows you to invite other users to use your Hava teams account. You can share data sources, environments and diagrams and use projects to...
Hava Teams allows you to invite other users to use your Hava business account. You can share data sources, environments and diagrams and use projects...
You can now control the AWS accounts connected to your Hava.io account directly within AWS Control Tower, so you always have all your AWS diagrams...