aws
AWS CLI Command Reference Guide L - Z
Use this AWS CLI Command Reference Guide to view all the available commands in the AWS Command Line Interface from L - Z. Each command details the...

AWS STS is an AWS service that allows you to request temporary security credentials for your AWS resources, for IAM authenticated users and users that are authenticated in AWS such as federated users via OpenID or SAML2.0.
You use STS to provide trusted users with temporary access to resources via API calls, your AWS console or the AWS command line interface (CLI)
The temporary security credentials work exactly like regular long term security access key credentials allocated to IAM users only the lifecycle of the access credentials is shorter.
Typically an application will make an API request to AWS STS endpoint for credentials, these access keys are not stored with the user, they are instead dynamically generated by STS when the request is made. The STS generated credentials will expire at which point the user can request new ones as long as they still have permission to do so.
Once the generated credentials expire they cannot be reused which reduces the risk of having your resource access compromised and removes the need to embed security tokens within your code.
The STS token lifecycle is determined by you and can be anywhere from 15 minutes to 36 hours.
AWS STS security tokens are typically used for identity federation, providing cross-account access and for resources related to EC2 instances that require access by other applications.
Just as an aside, if you are building on AWS, how are you automating your architecture diagrams? Have you checked out Hava?

Identity Federation Use-Case
Using AWS STS you can grant access to AWS resources for users that have been authenticated at your enterprise network. This enterprise identity federation removes the need to create new AWS identities and no new login credentials are required.
External web identities can be authenticated by a third party online identity manager like amazon, google, facebook or any other open-id connect compatible service. This web identity federation also removes the need to distribute long-term security credentials to facilitate access to your AWS resources.
Enterprise federation can use a number of authentication protocols like SSO and supports open standards like security assertion markup language SAML2.0 with which you can use microsoft active directory federation services ADFS if you are using Microsoft AD or you can use SAML to build your own authentication service.
Cross-Account Access using AWS STS
Lots of organisations maintain multiple AWS accounts and can use IAM identities and cross account roles to allow users from one account to access resources in another. Once the permissions are delegated to an IAM user, this trusted relationship can be used to request temporary access via AWS STS temporary credentials.
EC2 Instance STS Credentials
If you have applications running on an EC2 instance that require access to AWS resources, you can create temporary access credentials using AWS STS when the EC2 instance is launched. To do that, the EC2 instance will need to be associated with an IAM role to allow the application to request credentials. Once the security credentials are granted, they are available to all applications hosted on the EC2 instance so you do not need to store any long-term security credentials in the instance.

In this example we’ll set up a new AWS user with no specific permissions and create a role that has STS associated with it and has read-only S3 bucket permissions.
We’ll then try to access an S3 bucket from the AWS CLI before and after connecting to the profile with STS enabled.
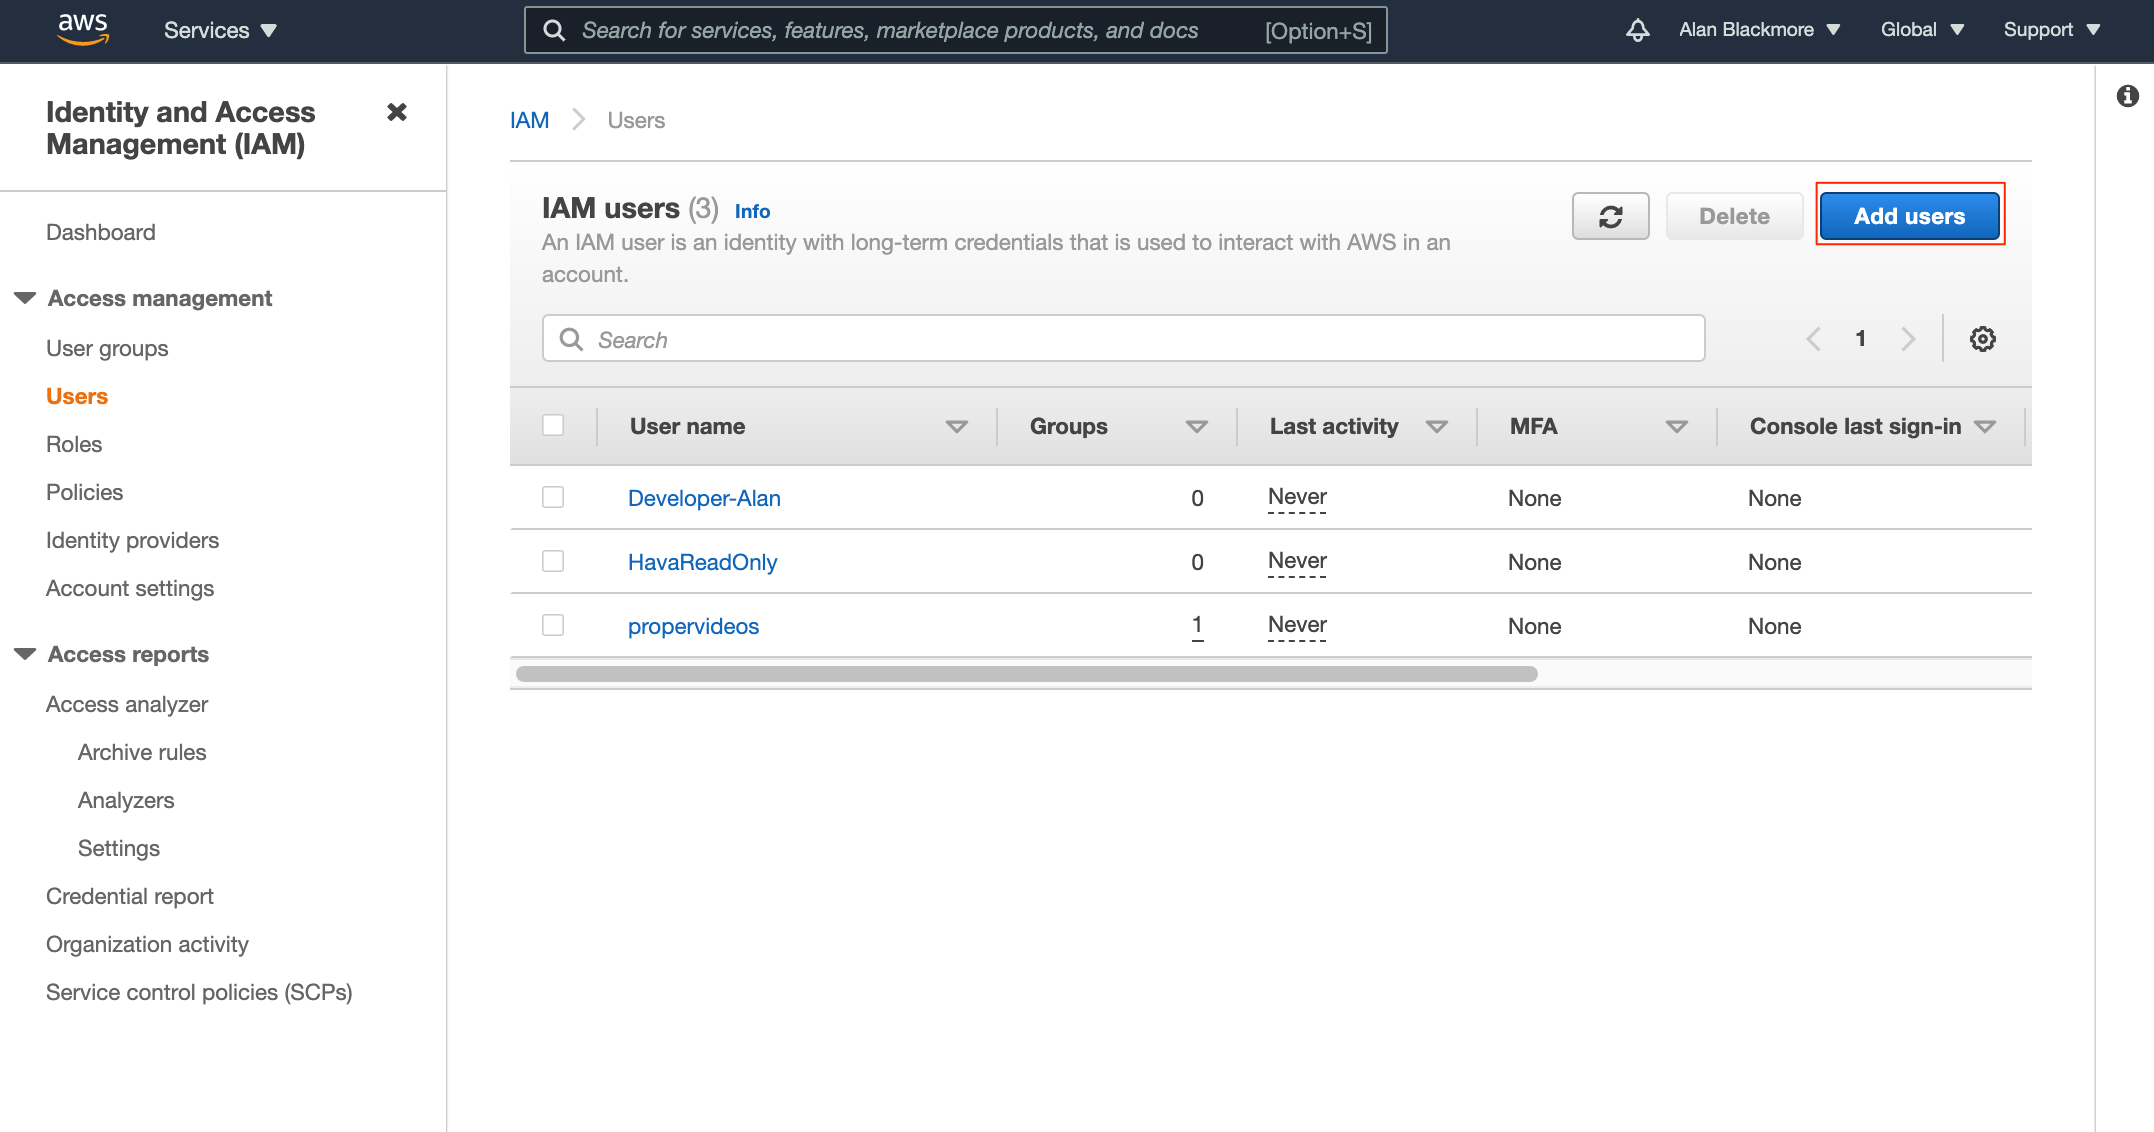
First of all we need to set up a new AWS user by going into Console > Services > IAM then hitting the Add users button:
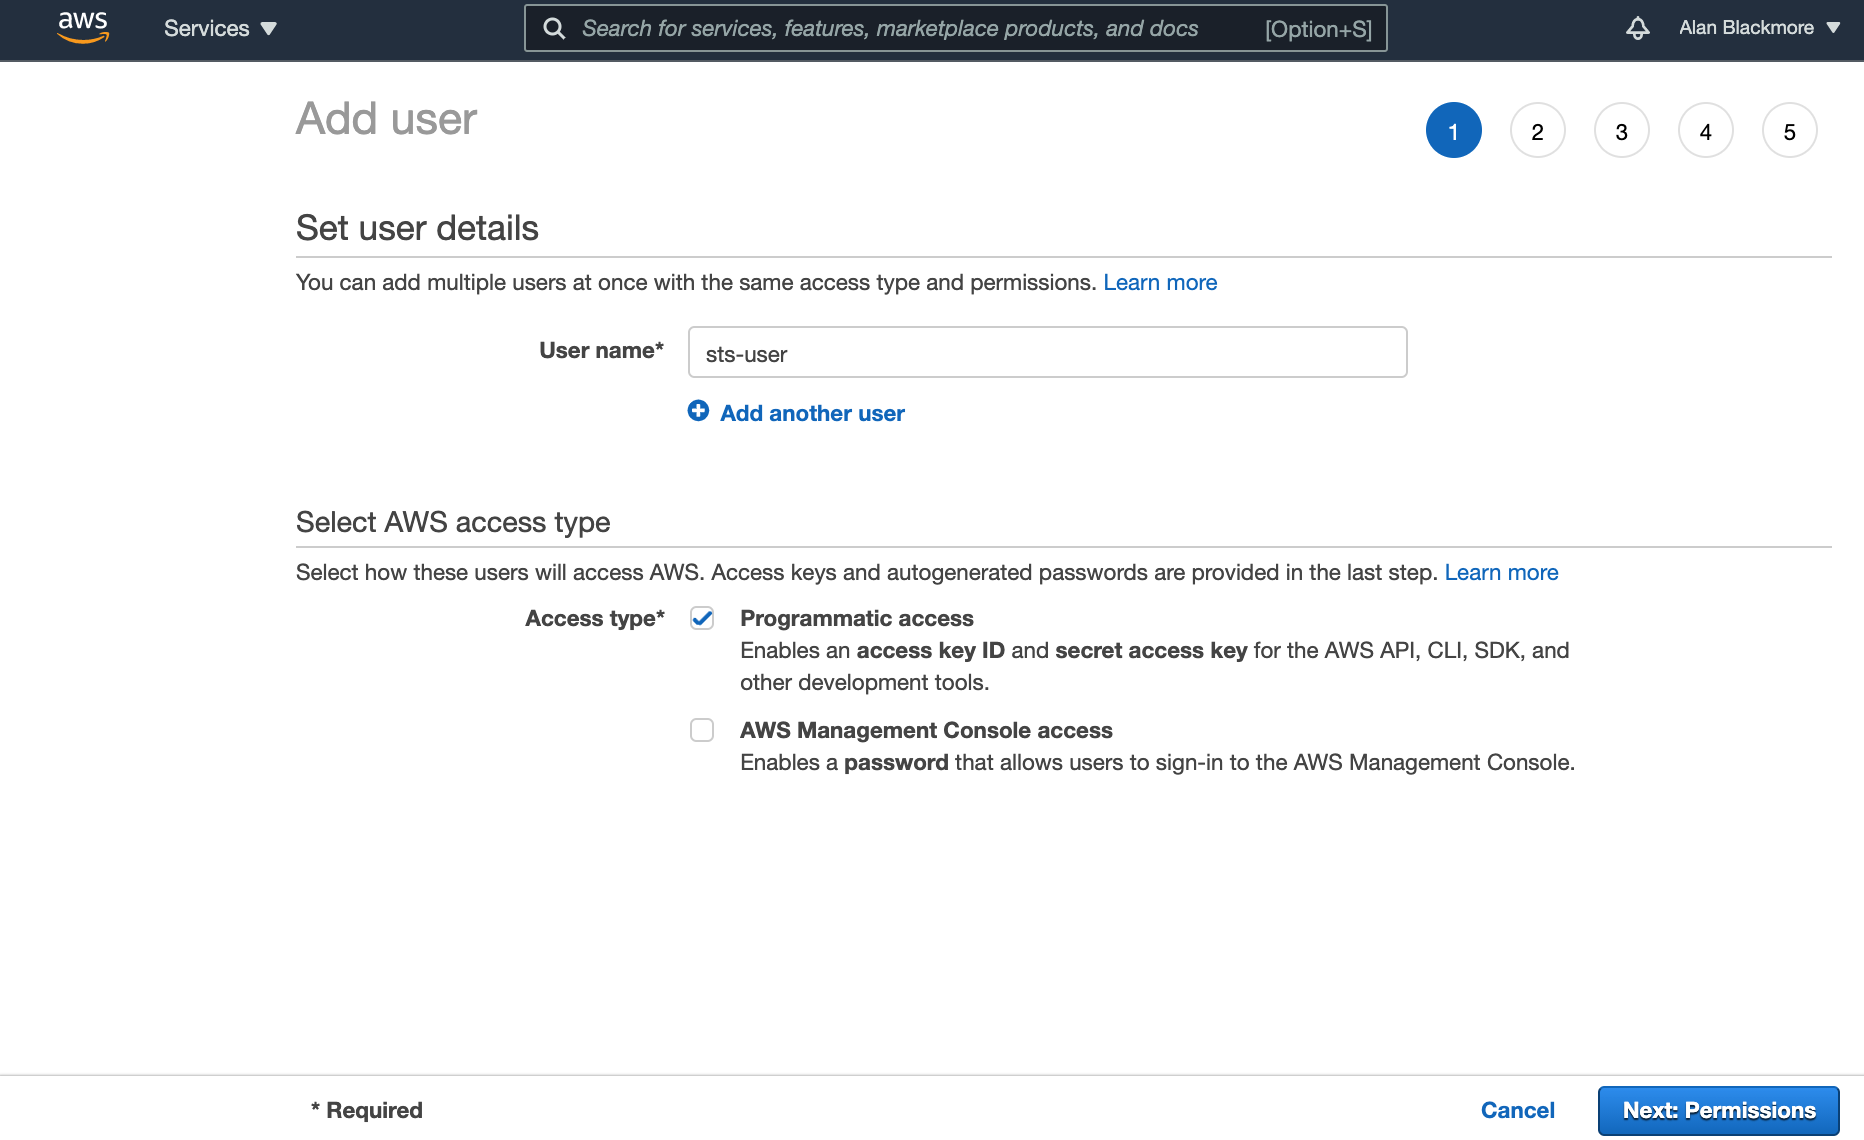
Then name the user and set the access type to Programmatic Access. In this example we'll set our user to sts-user.
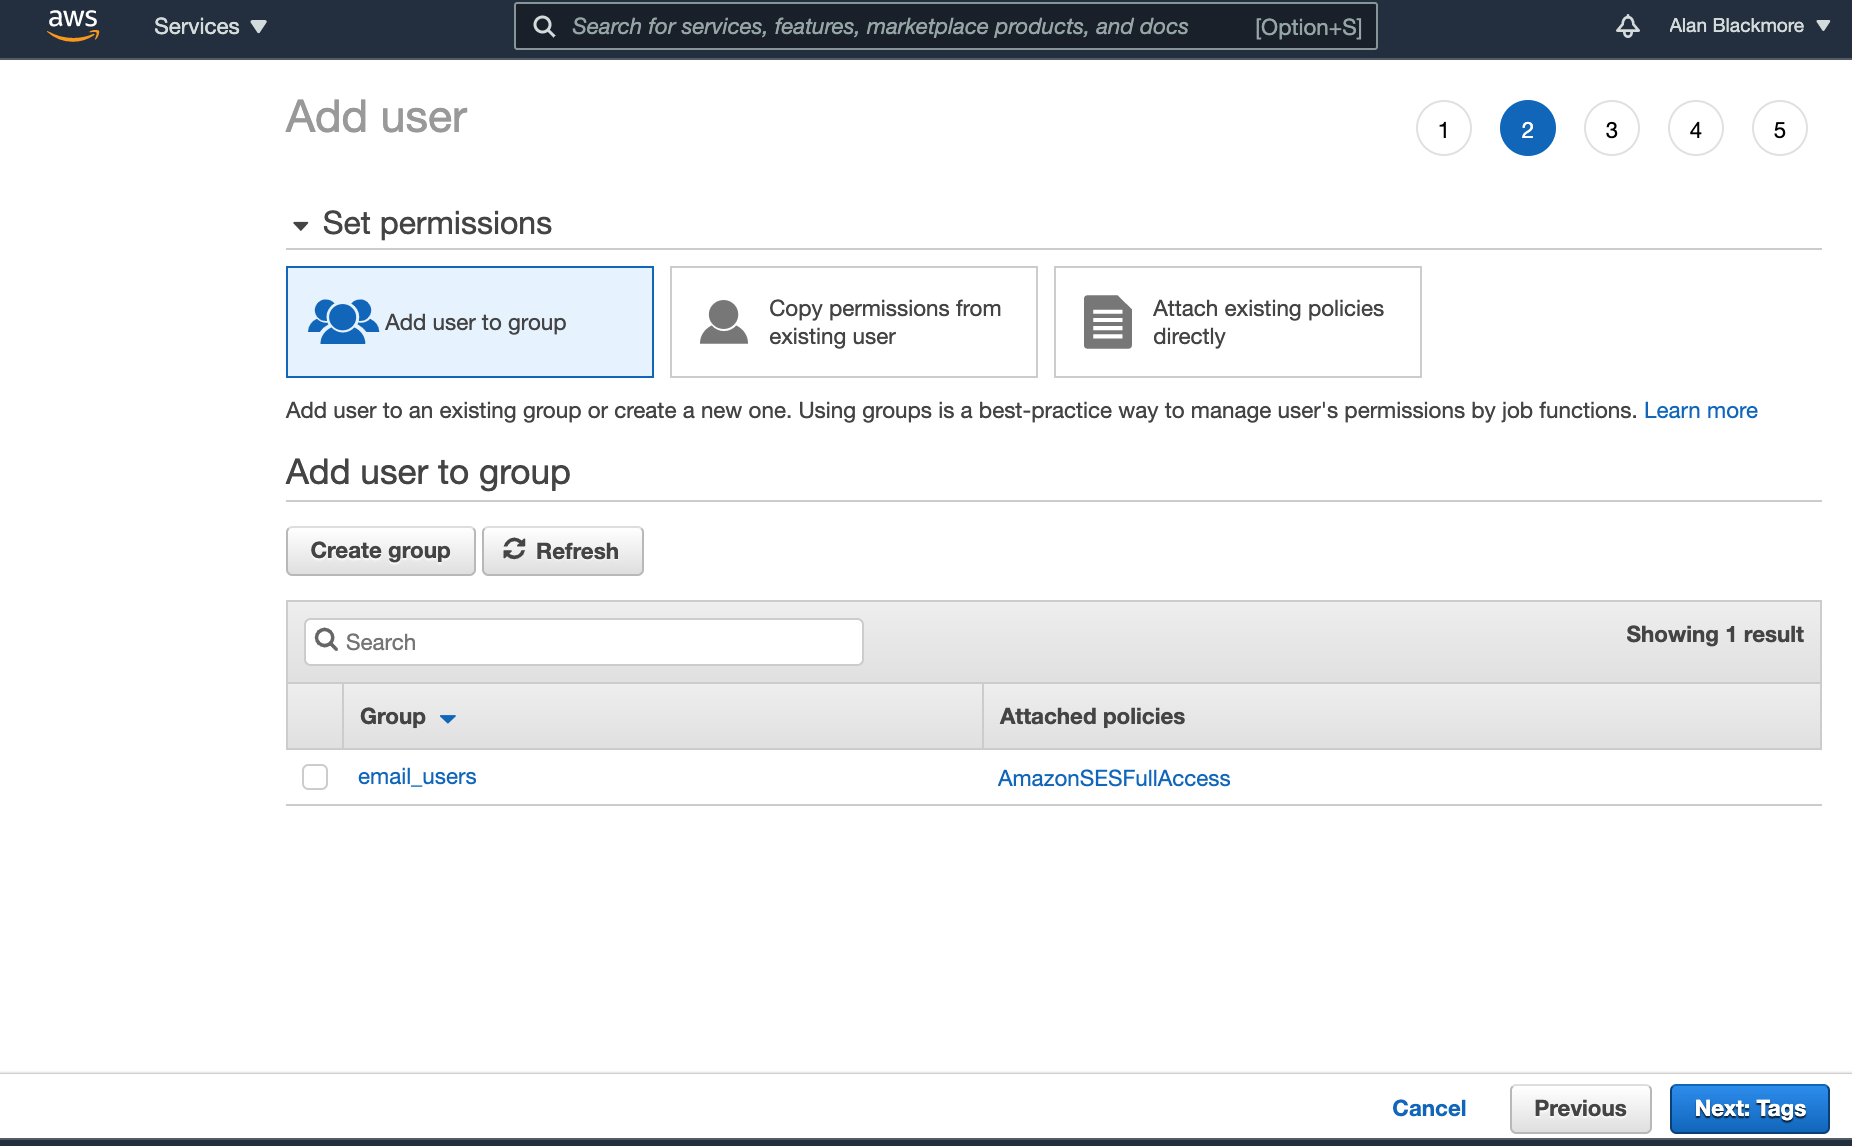
In the next screen related to permissions and adding the user to a group, you can skip the page without setting any permissions
You can also skip adding tags and advance to the review page:
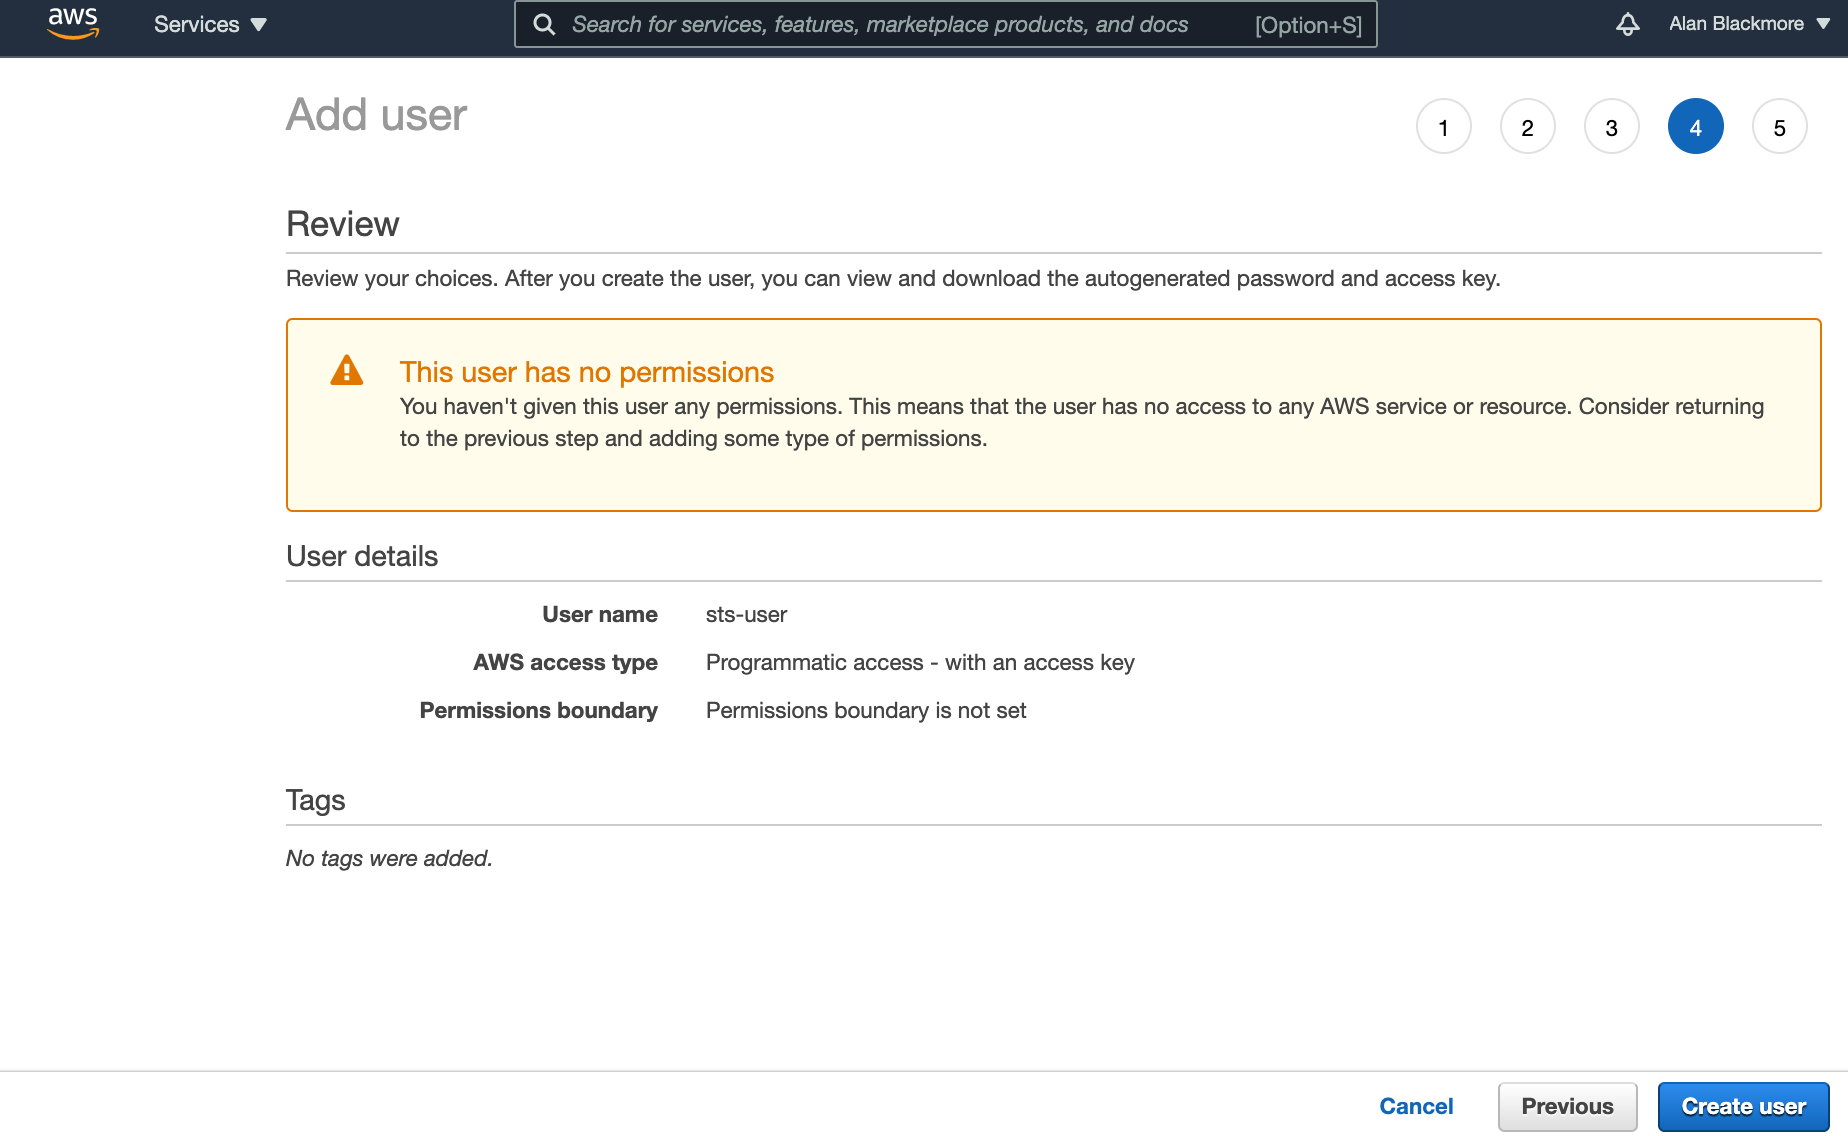
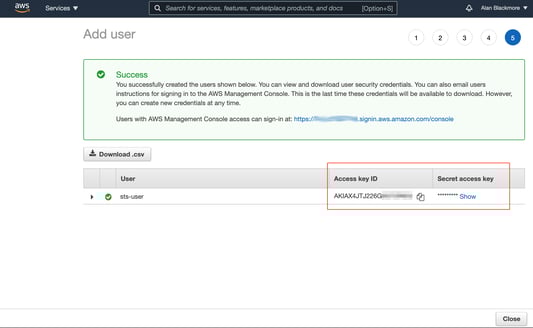
Click on create user. When the user created success page is displayed, copy down the Access key ID and the Secret Access Key into a text notepad document
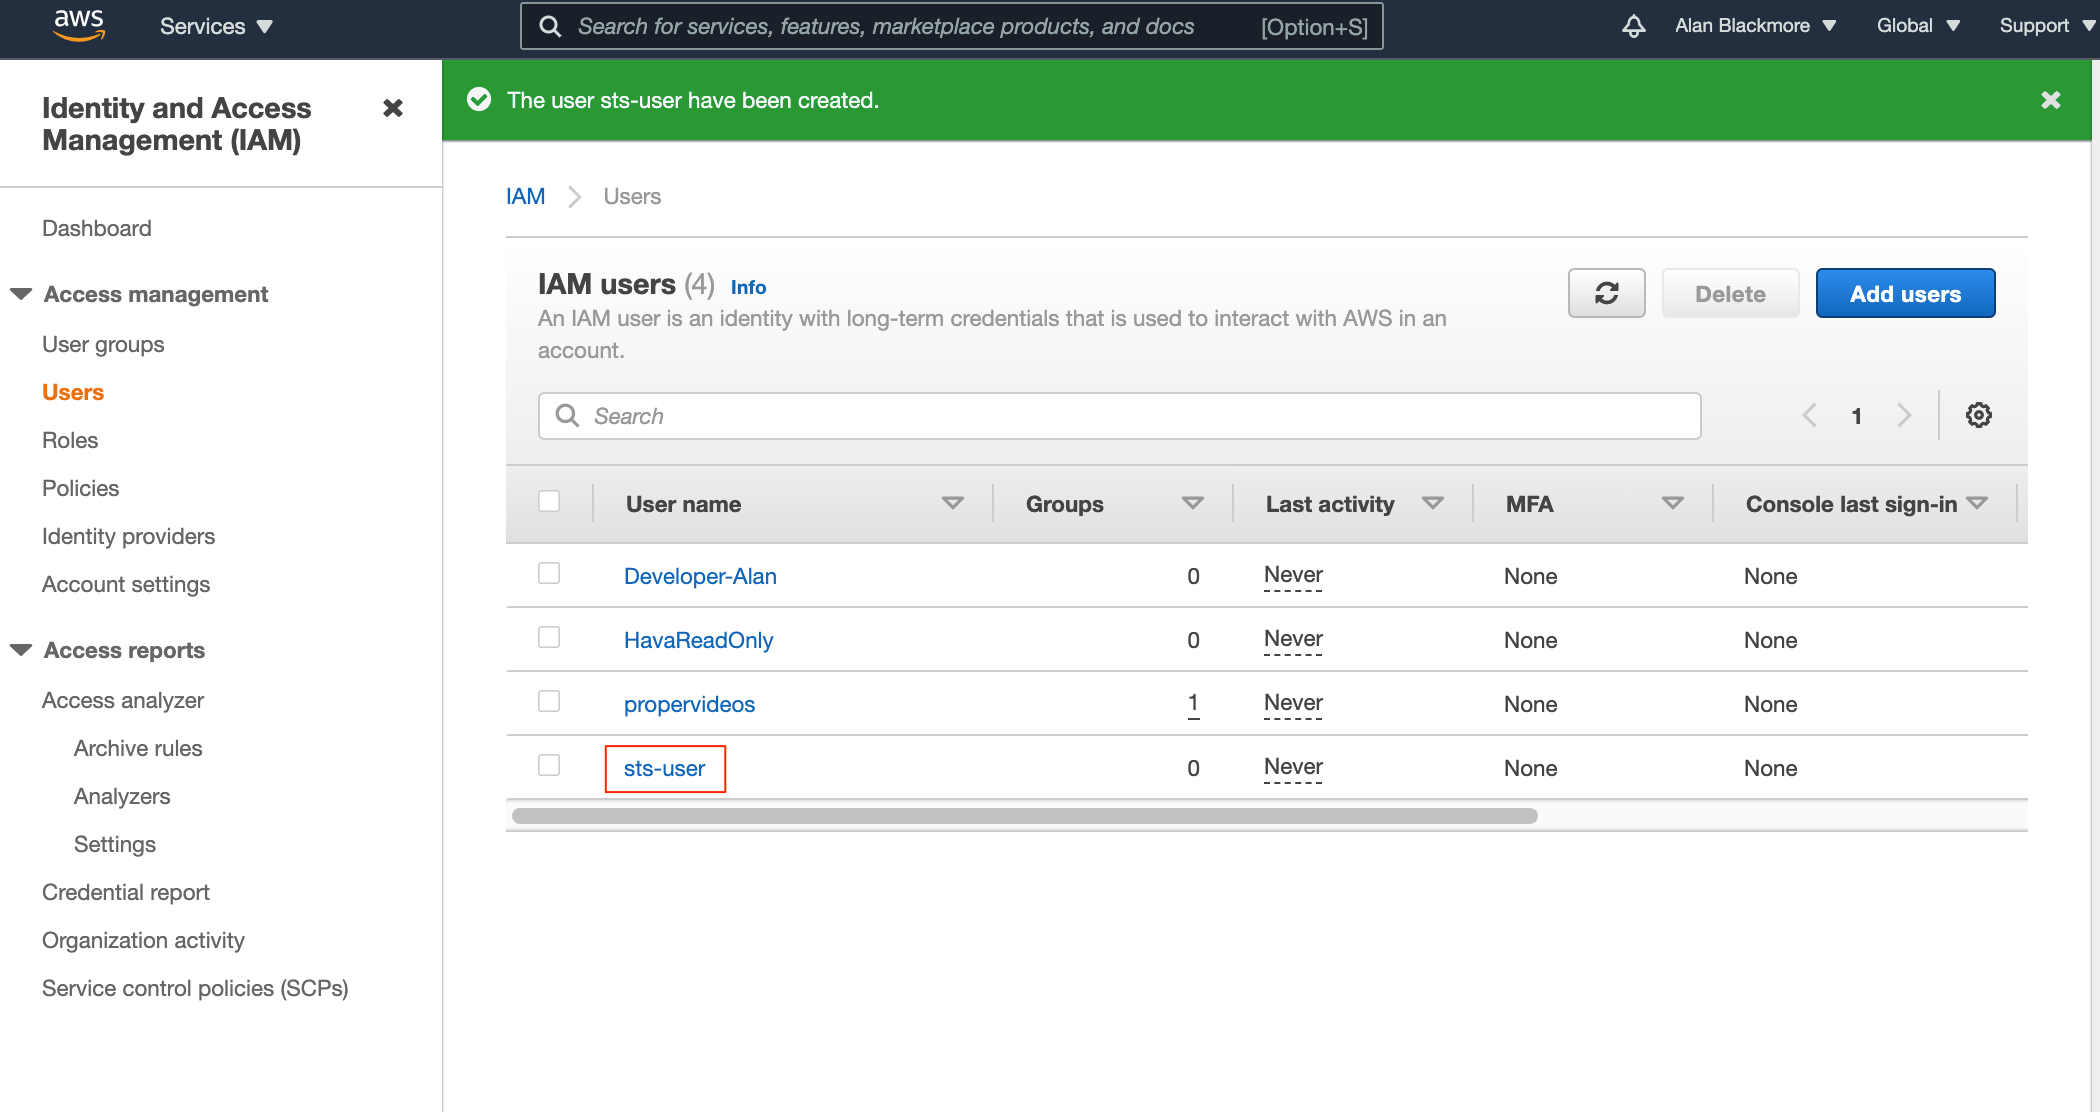
Then return to the IAM users page and open the new user just created.
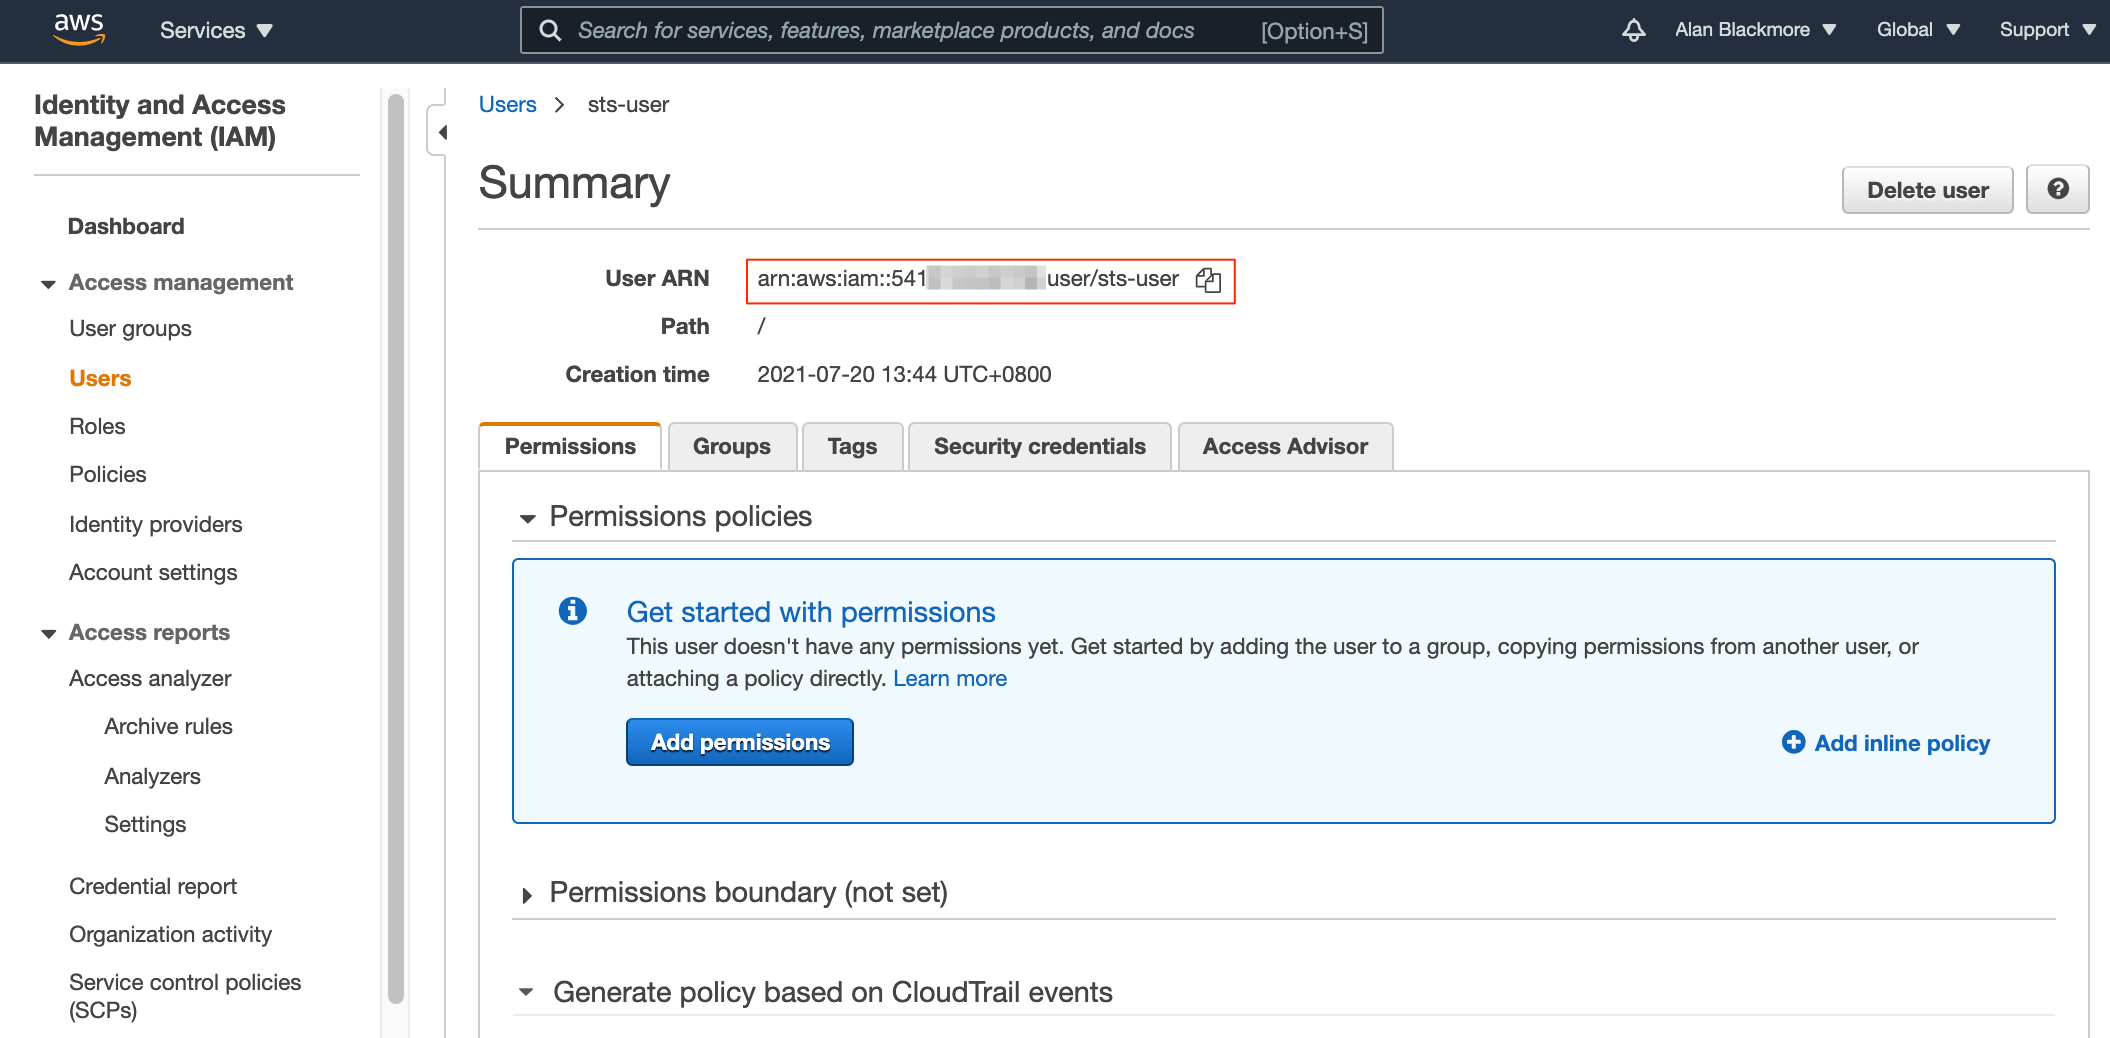
Copy the User ARN (Amazon Resource Name) and add that to your text notepad
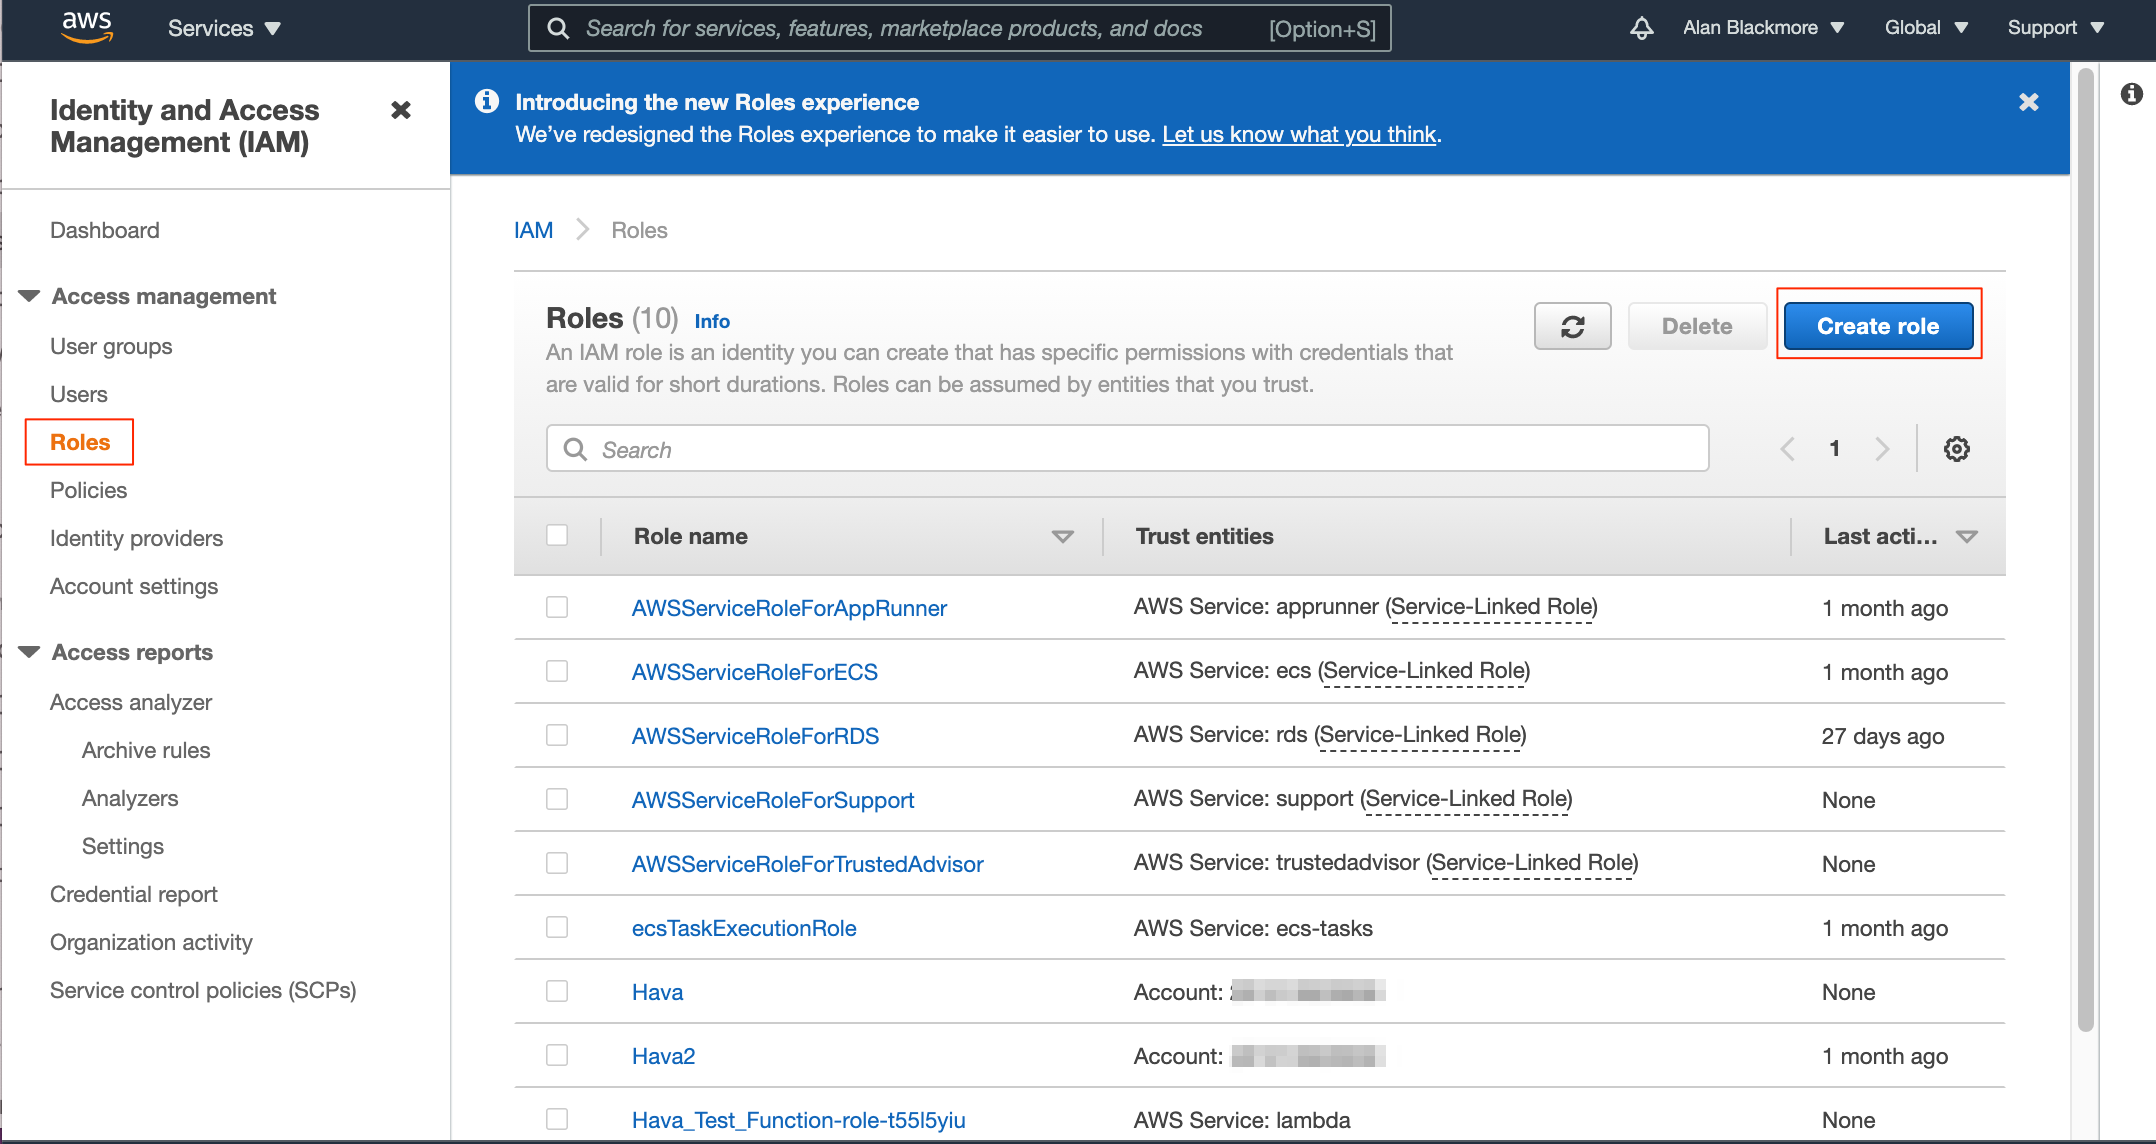
Now we need to create a new role, so navigate to the roles dashboard from the navigation bar on the left hand of the IAM services. Then “Create Role"
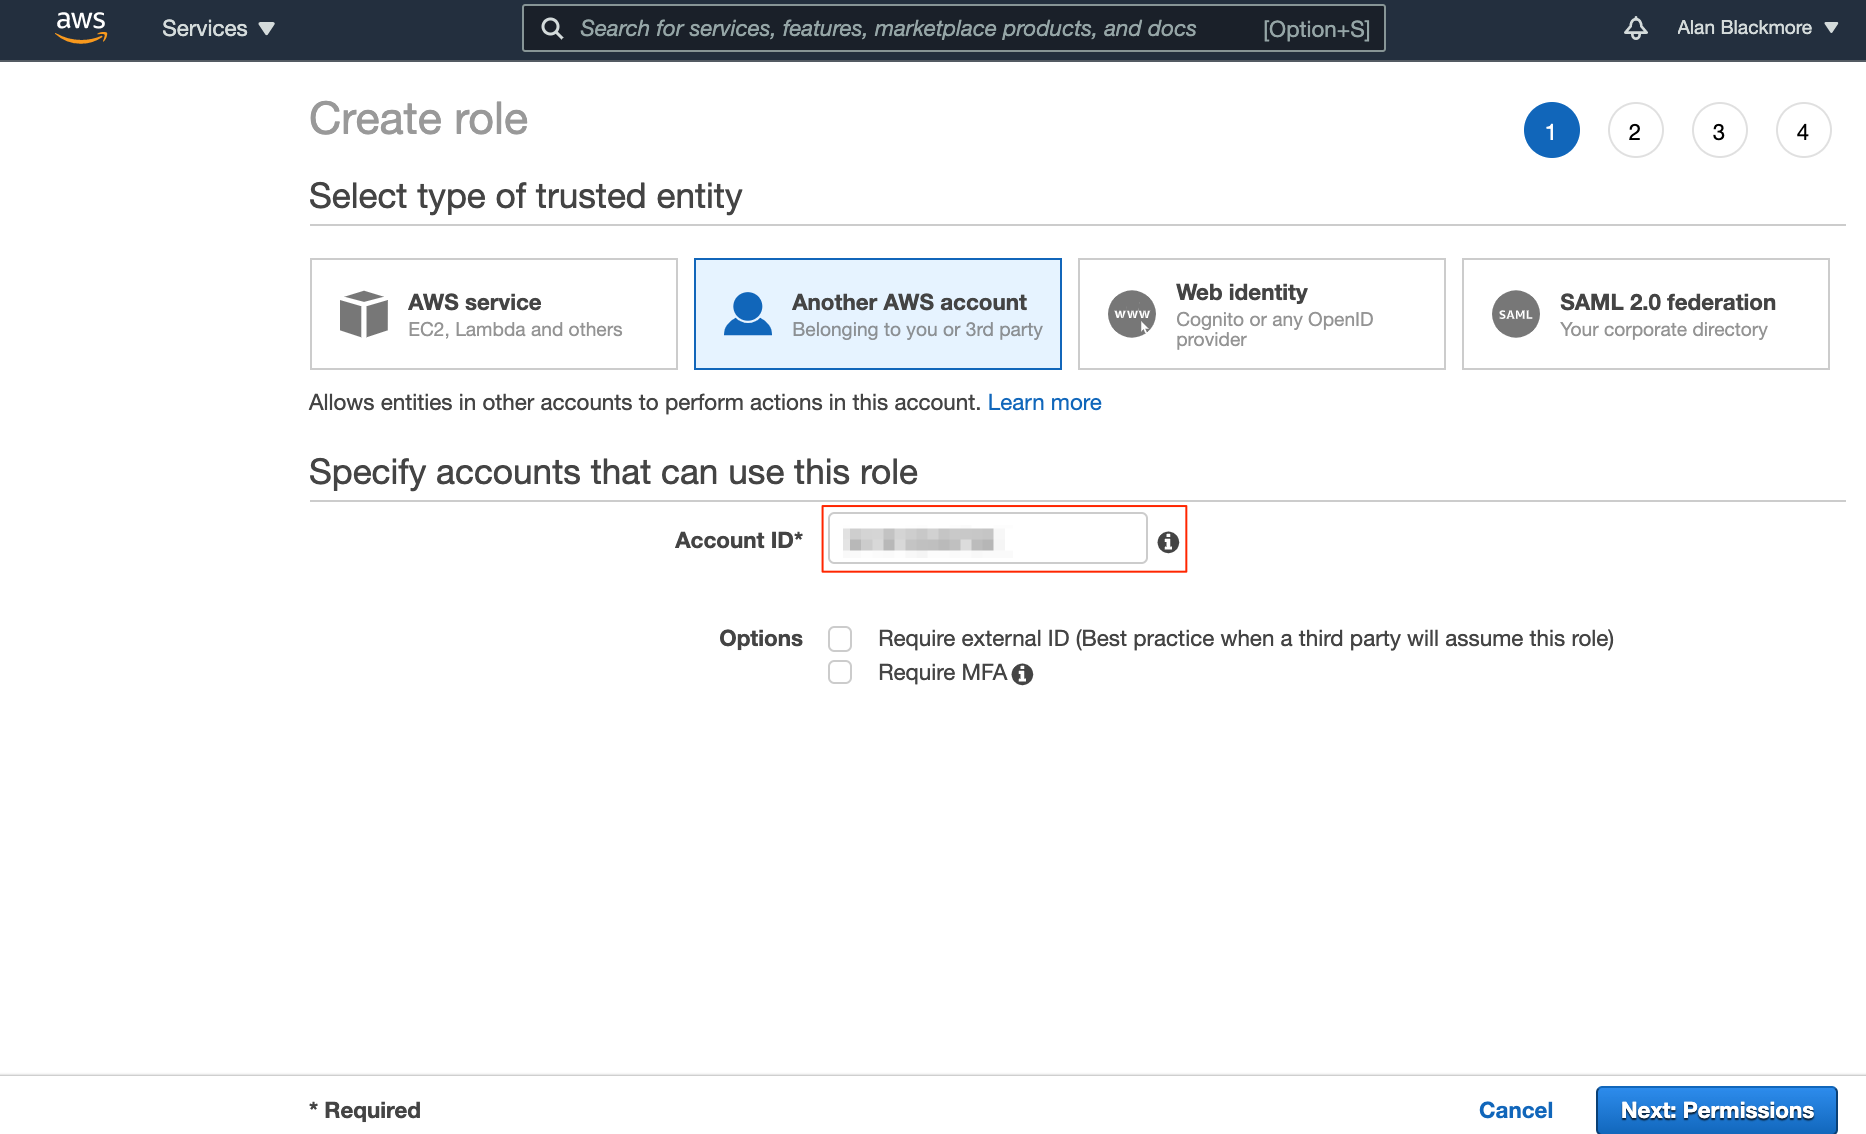
The next step is to select the type of trusted entity that you want to grant permissions to, which will ultimately be the service or user that will be maing the API calls to STS for temporary access credentials
These options are:
For the purposes of this example, we’ll use ‘Another AWS account’ and enter in the account ID that we’re using to set up the role.
The next step is to attach the permission policies you wish to allow this role to perform.
In this example, we want to grant access to read S3 buckets, so will attach the S3ReadOnlyAccess policy

Next you can add tags if you wish, or skip them.
Then advance to the Review page and name the role and add a description.
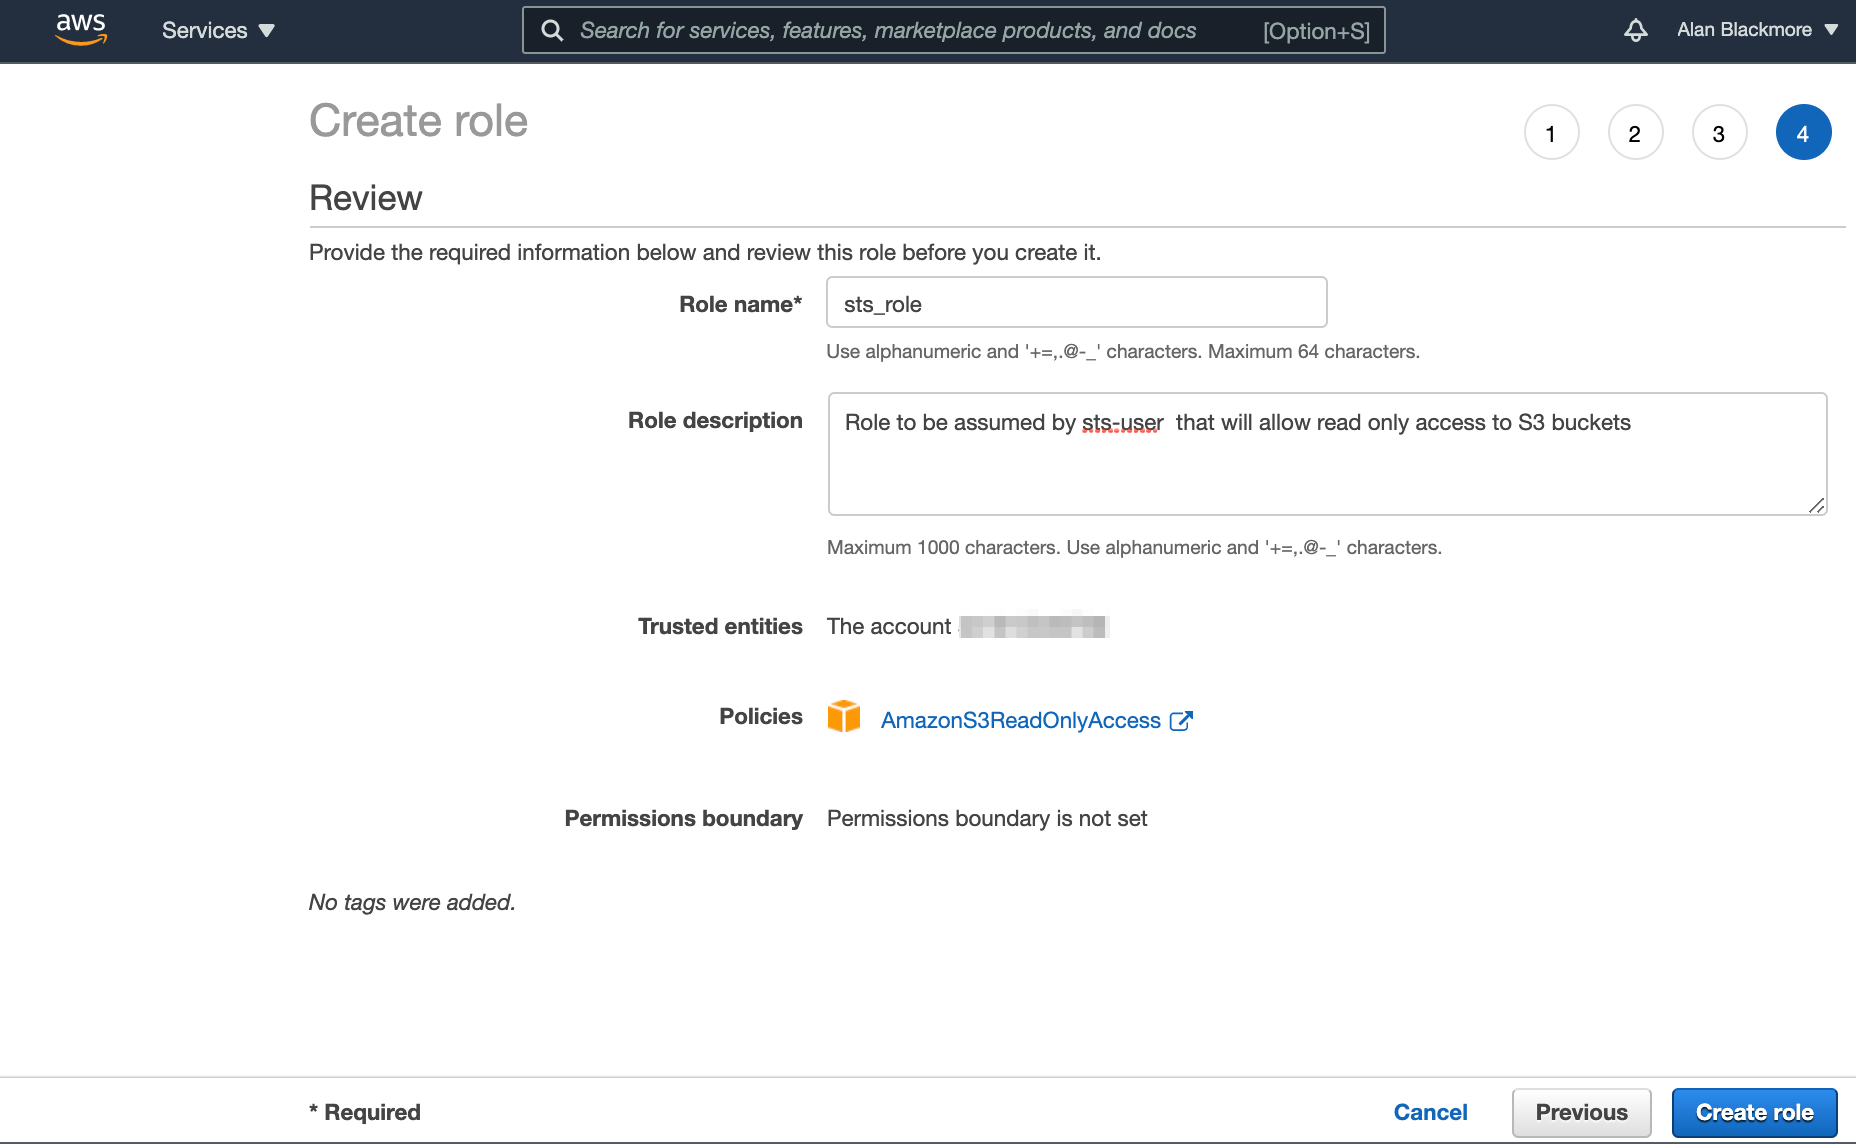
Once you are happy with the review page, create the role.
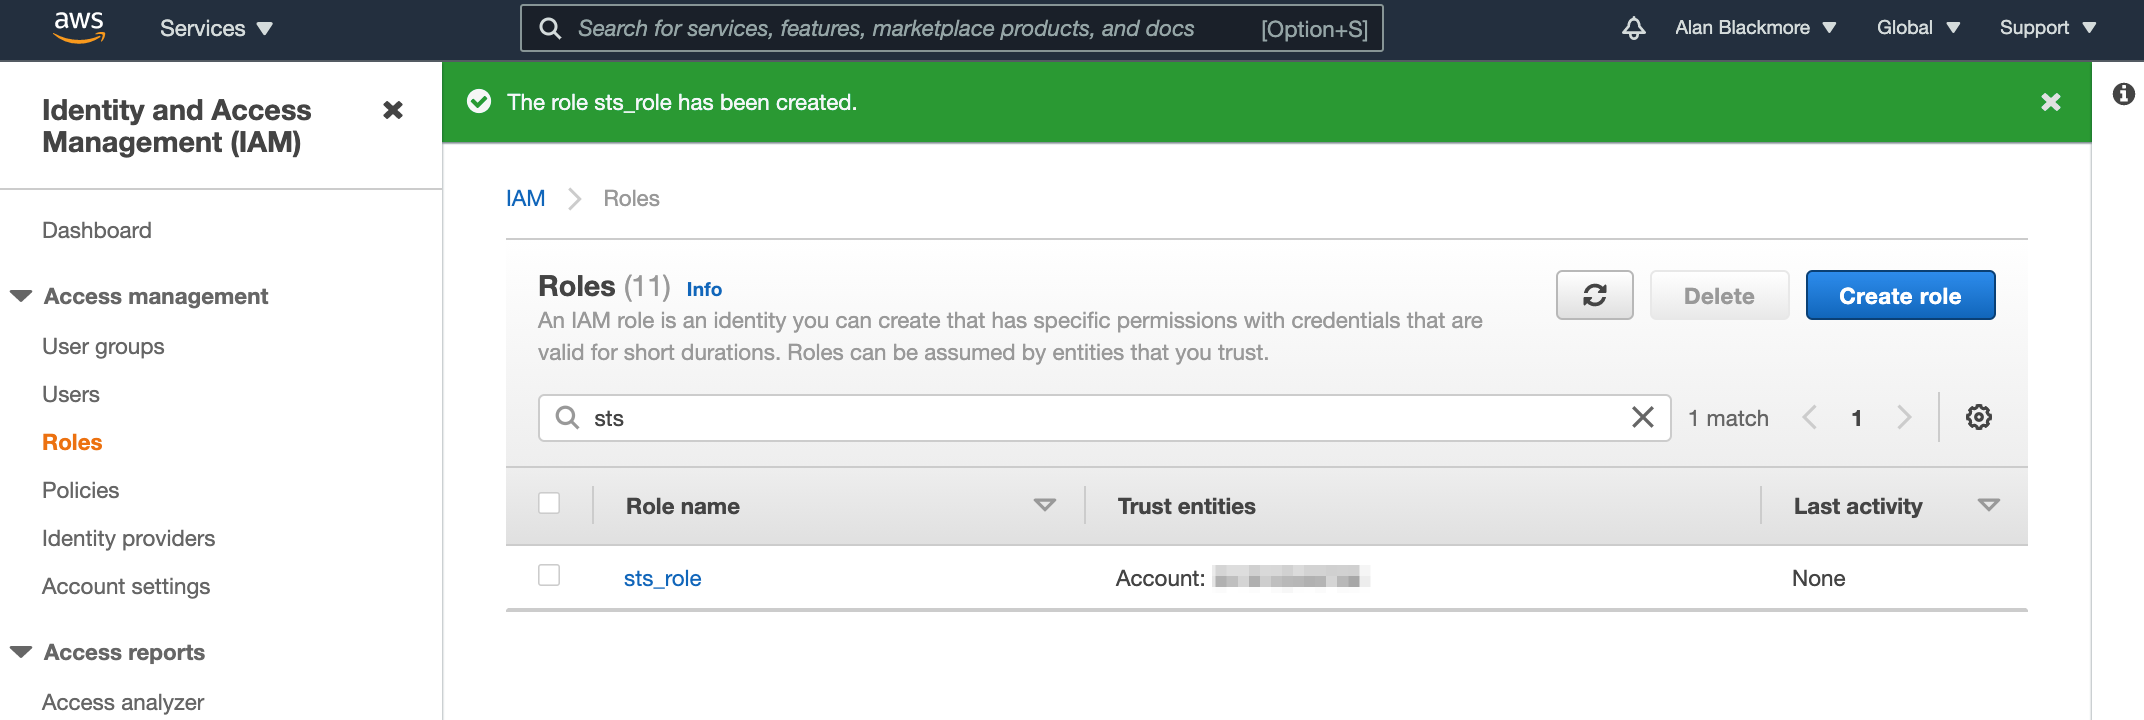
Open up the role and copy the role ARN to the text notepad for future reference.
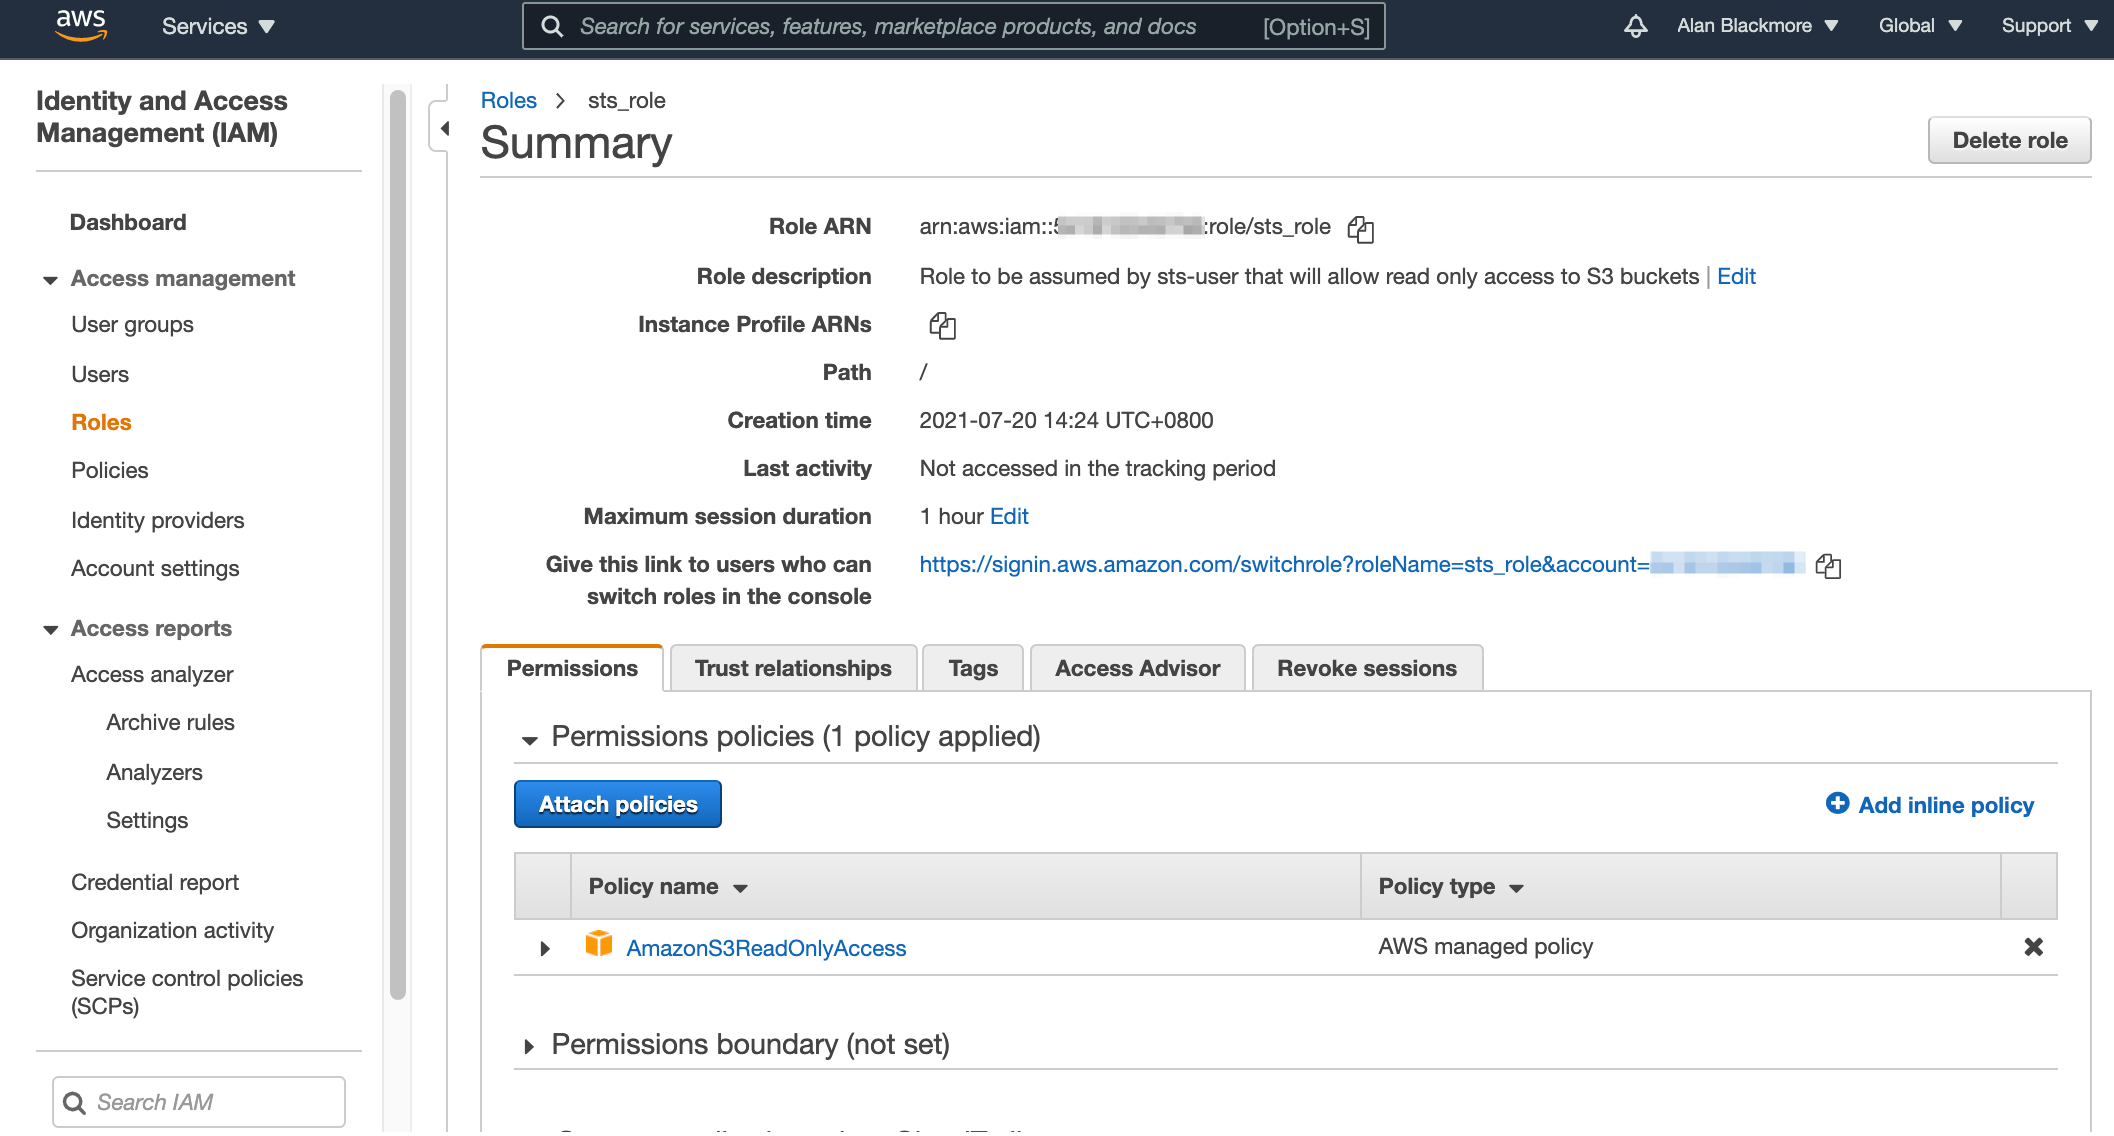
Now open up the trust relationships tab and edit the trust relationship
By default the trust relationship is set to trust the root account. You need to change this to set up the relationship with the user we set up (sts-user) by changing the ARN in the policy to the ARN for the user we set up and copied to the text doc
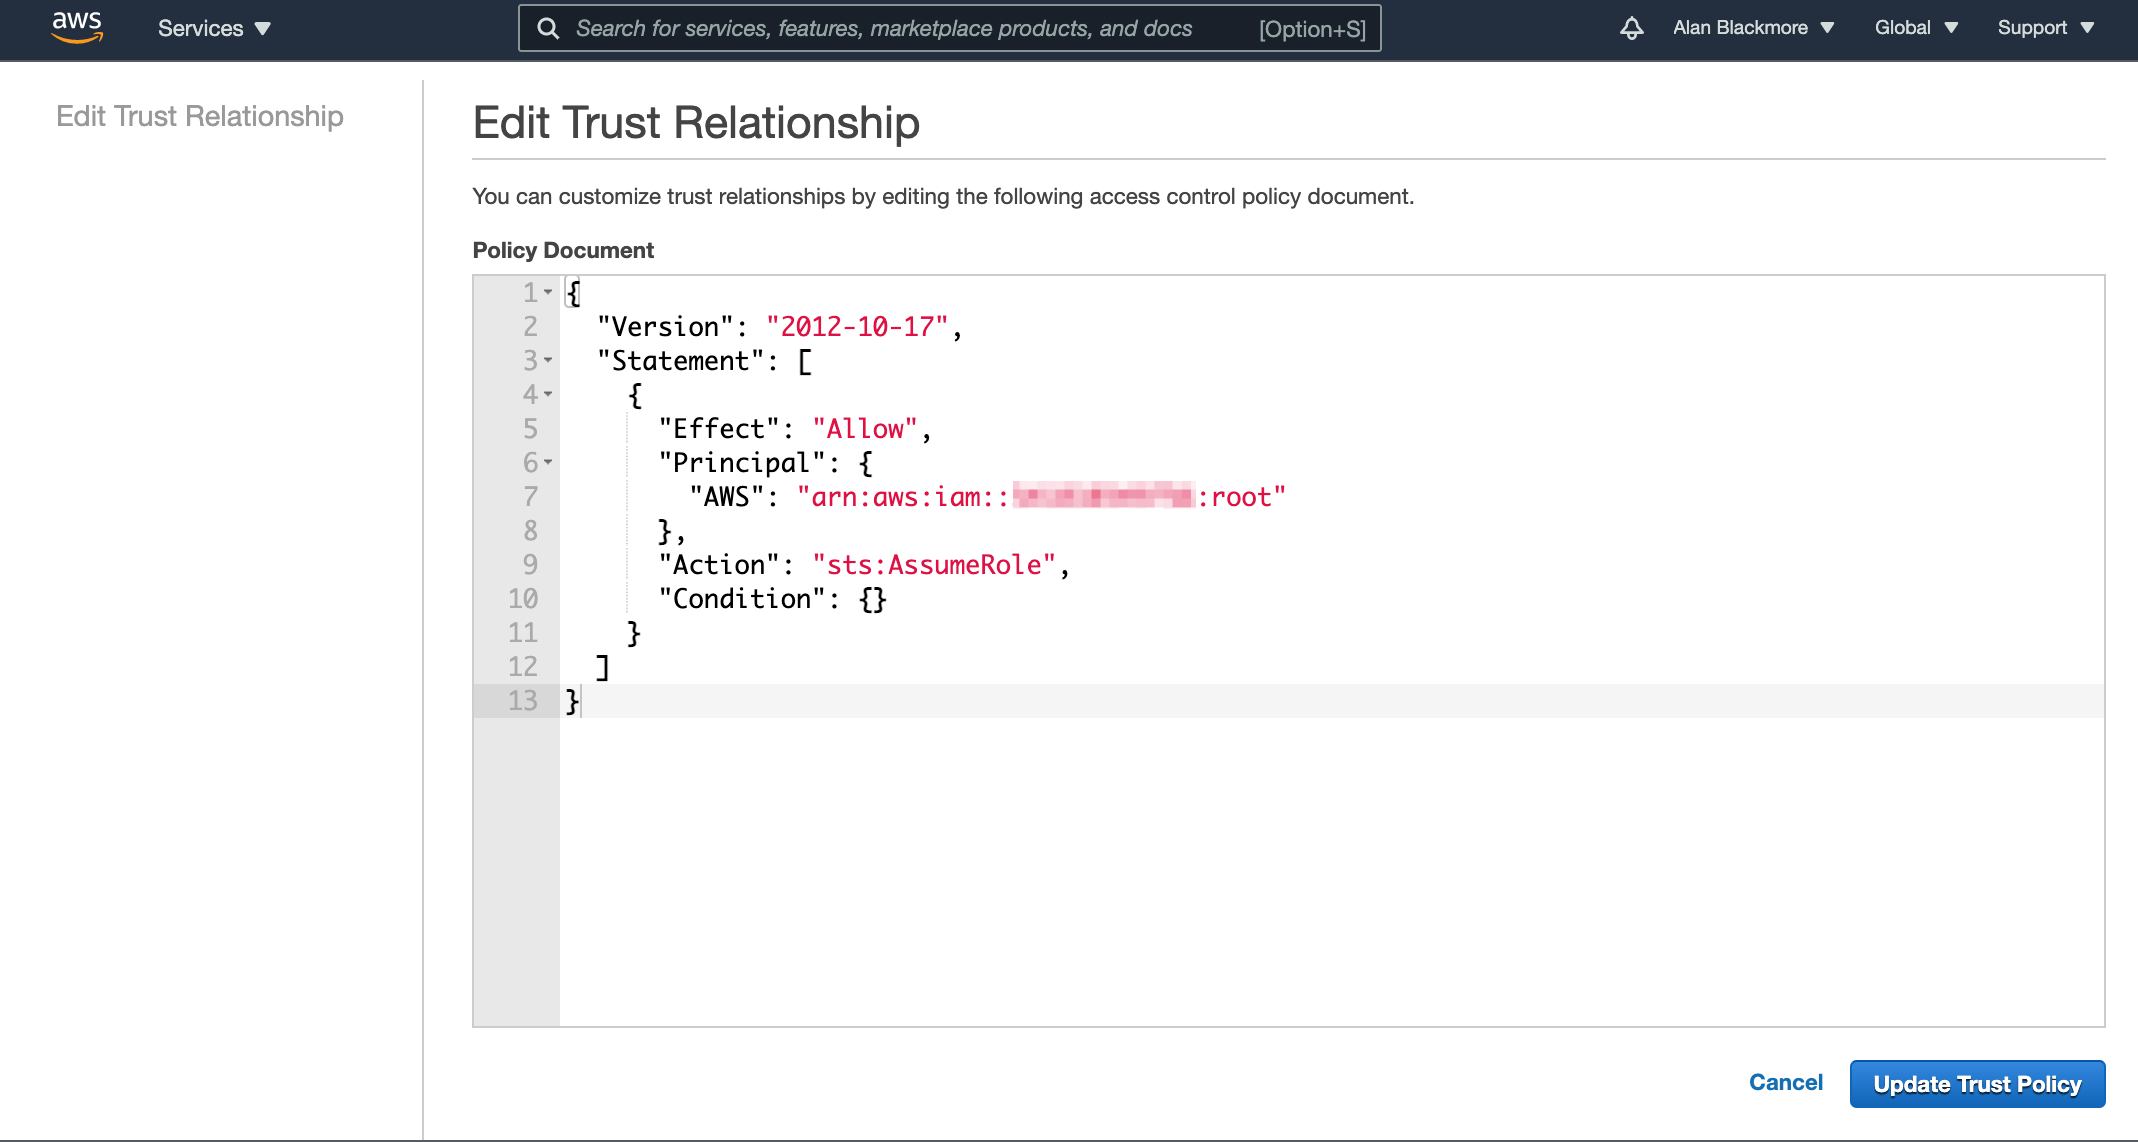
Then update the trust policy. Now return to the Users console, open up the new user and select the “Add Inline Policy” option.

Now select “Policy Generator” - here is where we define the connection to the AWS Simple Token System (STS) service.
Here we set:
Effect - set to Allow
AWS Service - set to AWS Security Token Service (STS)
Actions - Assume Role
ARN - The ARN Role we created and noted down in the text notepad.
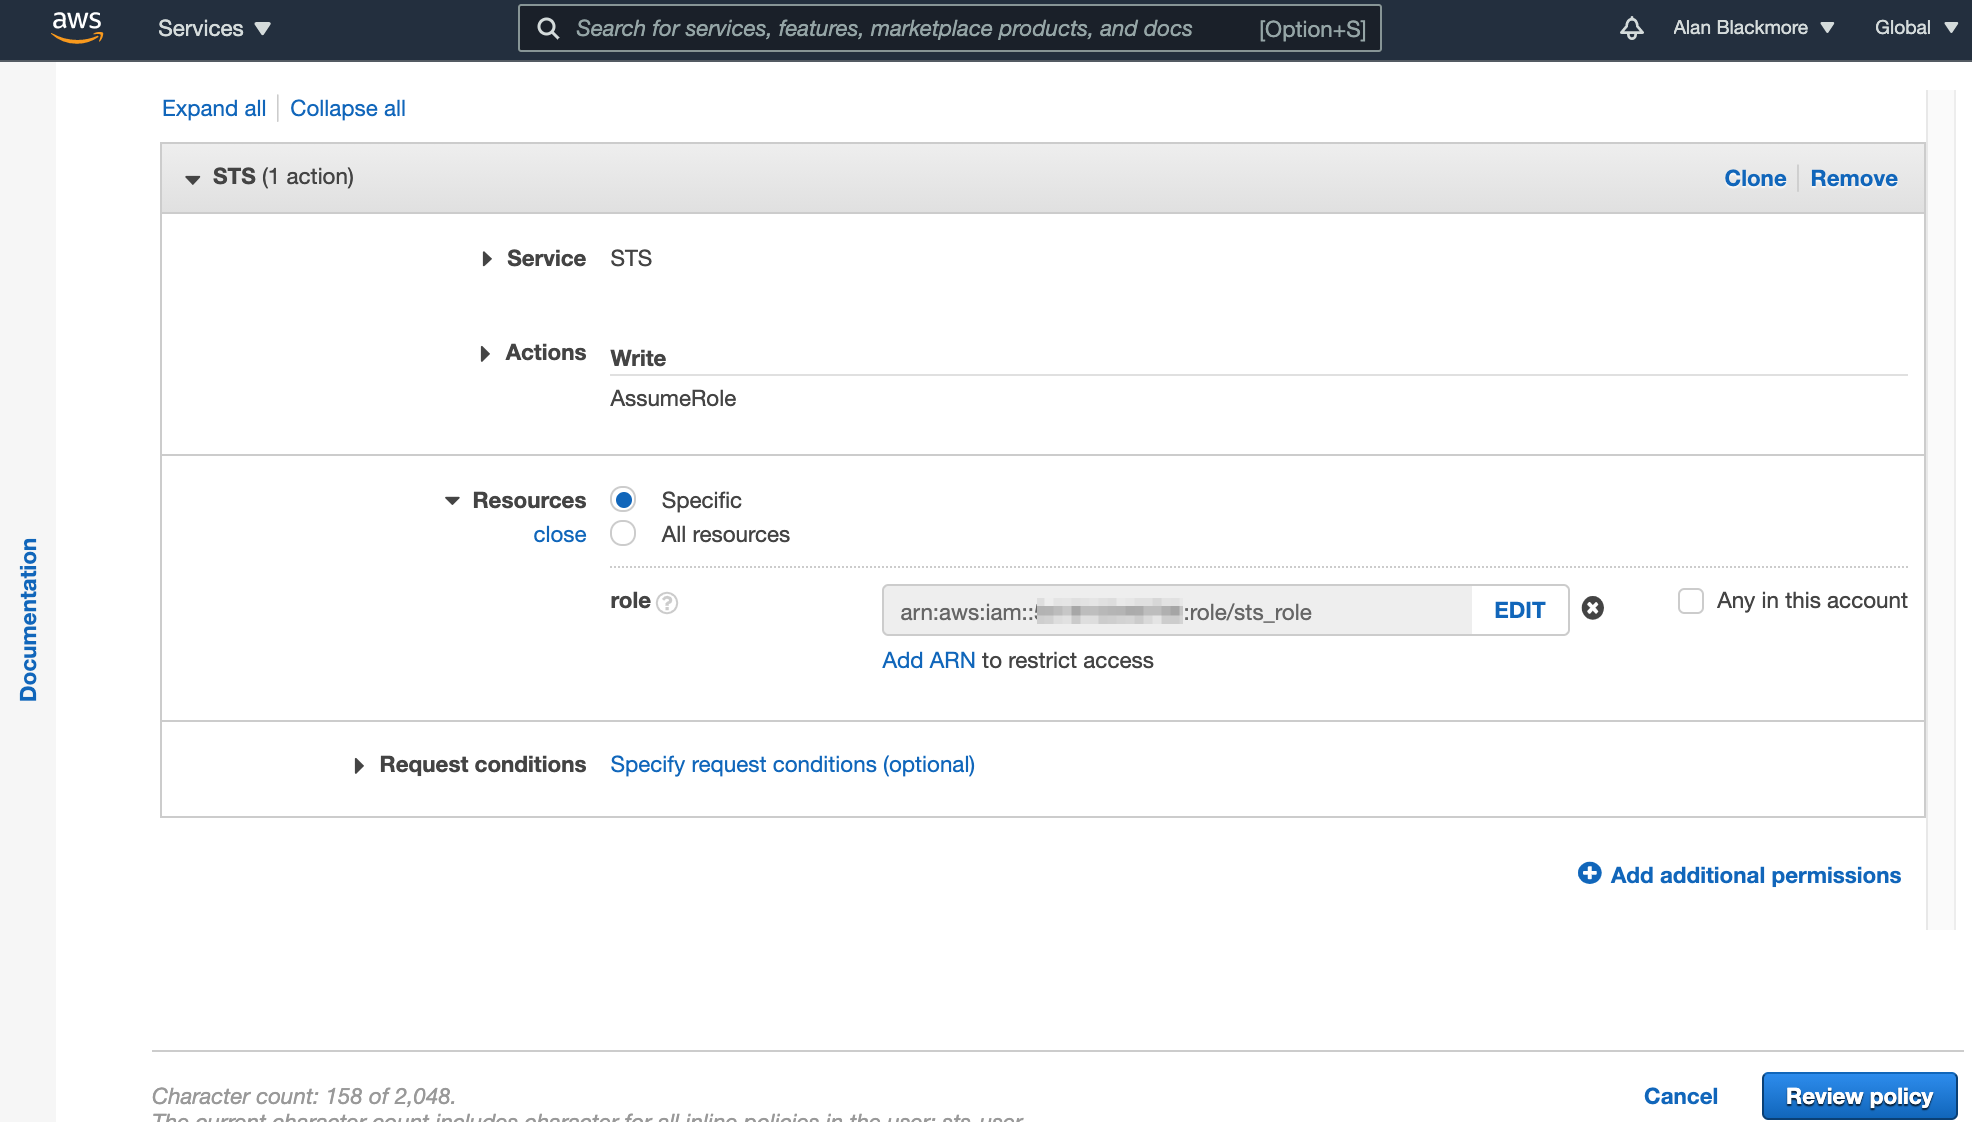
Then create the policy and we are ready to go.
In this example We’ll use the AWS CLI to access an S3 bucket called “425magfiles” using the sts-user which will generate access tokens on the fly to gain the read-only permissions required.
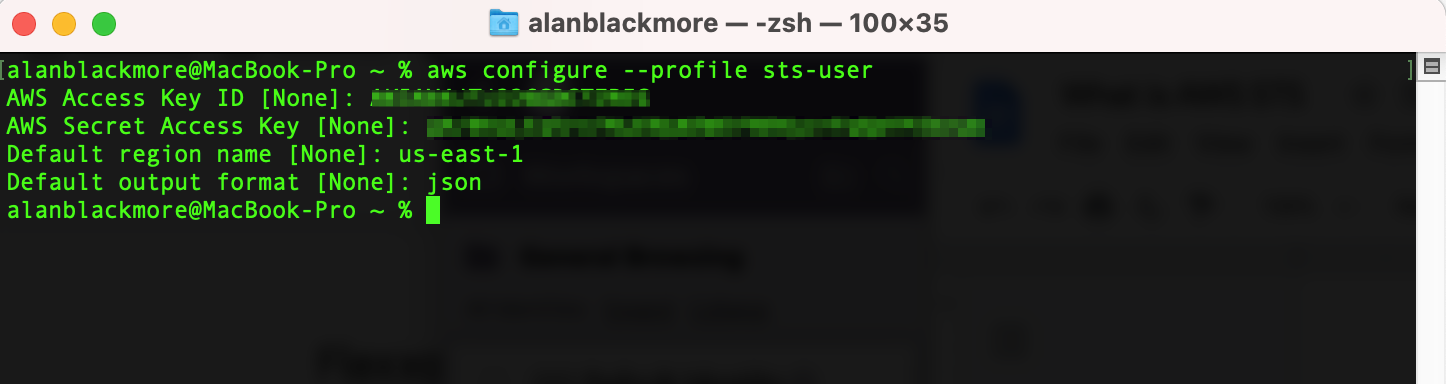
From a terminal window we then:
Aws configure --profile sts-user
Enter the Access Key (paste from notepad)
Enter the Secret Key (paste from notepad)
Set the default region - in this example us-east-1
Set the output format - to json
And then we’ll set the profile variable using:
export AWS_PROFILE=sts-user

Now if we attempt to access an S3 bucket, because there are no explicit permissions granted to sts-user, the request fails.

This is because we haven’t assumed the role required to grant the read permissions using STS.
To do this we use the command :
aws sts assume-role --role-arn arn:aws:iam::xxxxxxxxxxxx:role/sts_role --role-session-name "Session1"
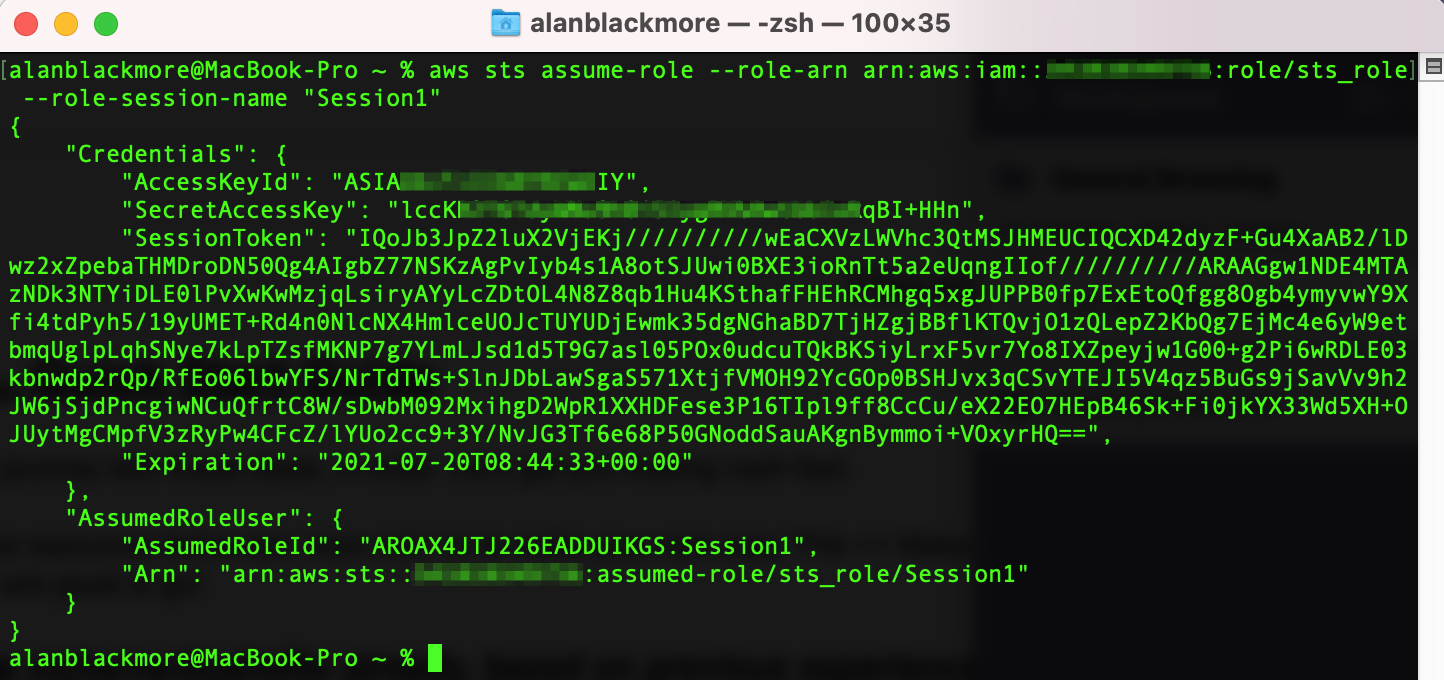
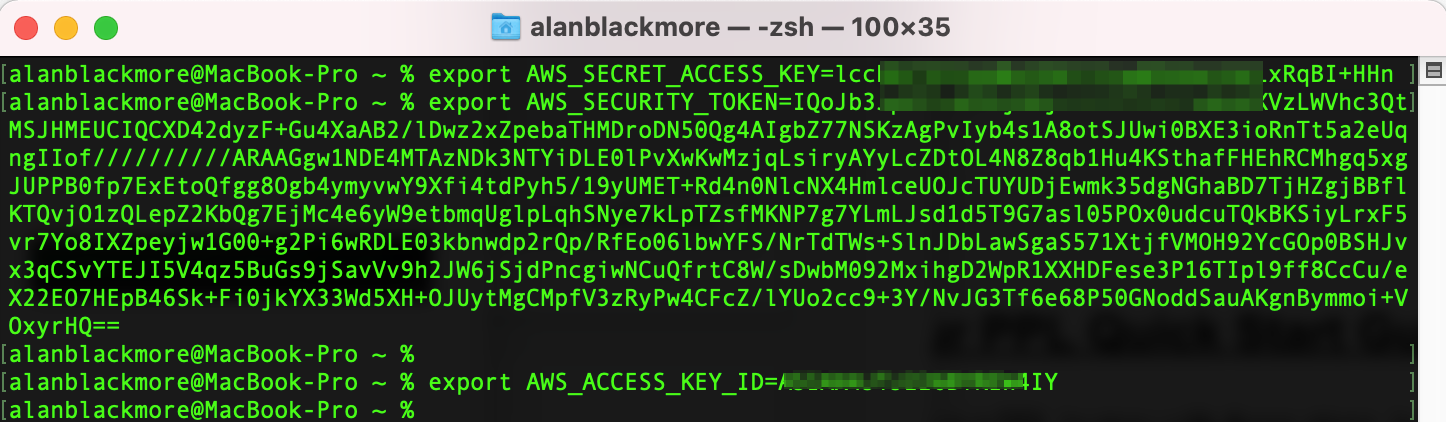
Now to set up the current session variables to use the session values returned during the assume role, we need to set 3 values using the export CLI command;
export AWS_SECRET_ACCESS_KEY= (SecretAccessKey)
export AWS_SECURITY_TOKEN= (SessionToken)
export AWS_ACCESS_KEY_ID= (AccessKeyId)
The values can be extracted from the JSON returned from the sts assume-role command shown above
Now the CLI session has the permissions granted by STS in play and we can interrogate the contents of our S3 bucket.
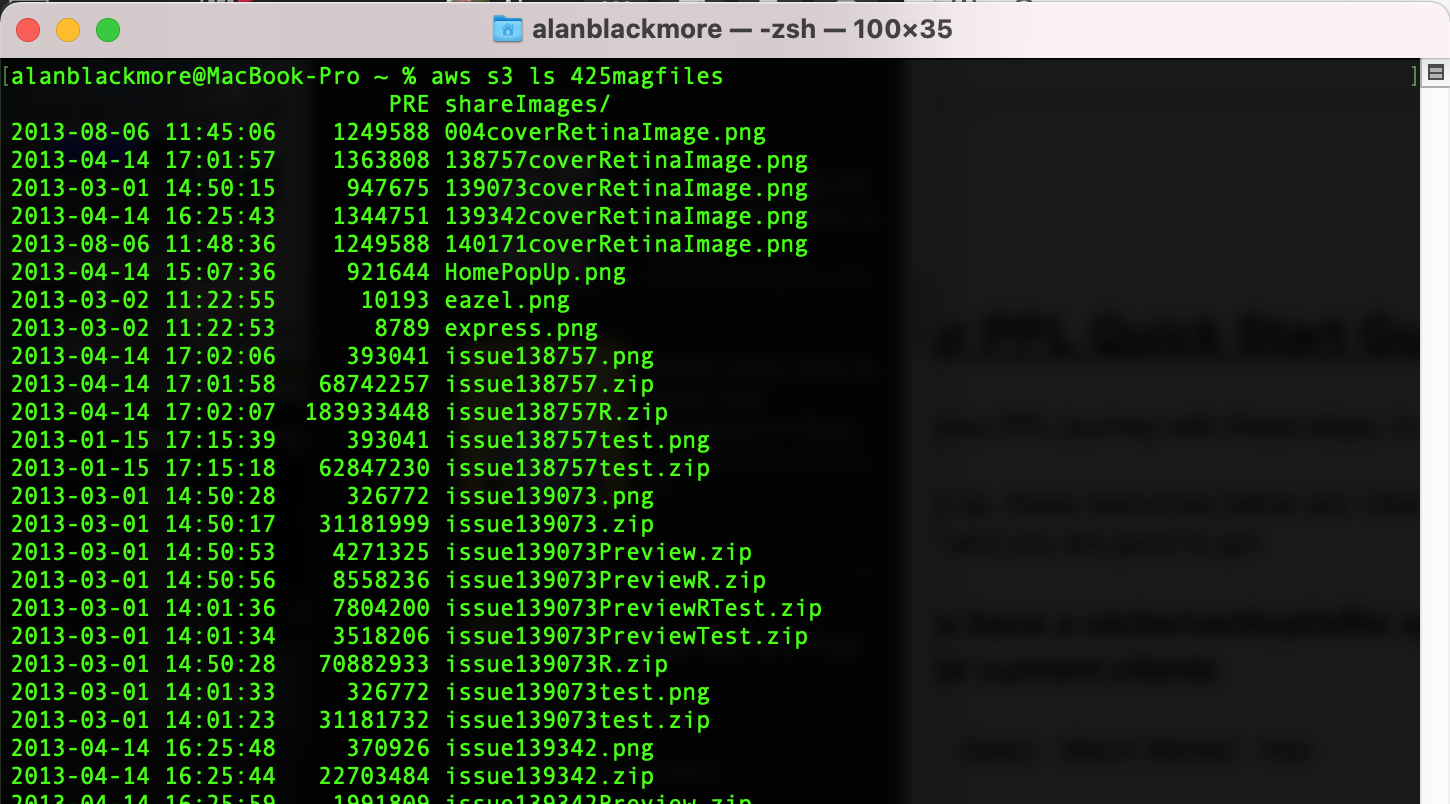
Success!
So there we have it, a quick run through AWS Security Token Service and an example use case using the AWS CLI.
If you are building on AWS and are still drawing AWS VPC diagrams manually we would like to invite you to experience a better way. Hava fully automates the generation and updating of your AWS, Azure and GCP network infrastructure diagrams. Using Hava you can free yourself from drag and drop forever while enjoying clear and accurate cloud network topology diagrams whenever you need them.
You can find out more about Hava here:
Use this AWS CLI Command Reference Guide to view all the available commands in the AWS Command Line Interface from L - Z. Each command details the...
The AWS CLI Command Line Interface allows you to interact with your AWS services and resources via the command line terminal on your local machine....
Use this AWS CLI Command Reference Guide to view all the available commands in the AWS Command Line Interface from A - K. Each command details the...